

This one is dedicated to my lovely wife, Grace. During our first year of dating, on a typical warm summer day in L.A. — we decided to hang out at the pool in her apartment complex. I thought, “You know what would make this absolutely perfect? Lychee martinis …” So I gathered the ingredients, mixed the drinks & sure enough, on that typical warm sunny afternoon — while our bank accounts may have been next to nothing — we certainly felt like a million bucks (& fyi, the drinks turned out quite well, thank you). So well, in fact, that a couple of years later — we served that same drink at our wedding reception. Salud!
To order a museum-quality print of this piece (shipped global, directly to you) please visit Good Mood Prints:
Why is this series called "The City Of Angles"?
I moved down to Los Angeles in 2009, and after sixteen years (!) of living in this sprawling mecca of diversity, art, entertainment, cuisine, music and culture — I finally feel like I have some perspective on one of the greatest cities on earth. After getting laid-off from my software job at the time, I decided to take on a little mini-series of paintings in honor of some of my favorite things about Los Angeles and some distinct memories I've had here — and I call it The City of Angles (see what I did there? 😉) I think that title works on multiple levels; people come to L.A. not just for the warm weather, hiking and theme parks — but lest we forget, Los Angeles is a city of dreamers ... a city of builders ... a city of artists ... a city of doers ... Heck, you might even say that everyone here ... has an angle? 📐
So my angle with this series was to return to simplicity. After all, if you asked some luminaries what they thought of simplicity?
“Simplicity is the ultimate sophistication.” — Leonardo da Vinci
or perhaps
“Simple can be harder than complex: you have to work hard to get your thinking clean to make it simple.” — Steve Jobs
So what did that mean for my paintings? Some questions I had to ask myself:
- How can I do "more with less"?
- How can I restrict the number of colors that I use in my palette?
- How can I simplify compositions to the point where shapes and lines and elements are balanced and interesting enough to "do the talking" (instead of filling the composition with needless complexity)?
- How can I leverage "negative space"?
- How can I "suggest" things in a painting (instead of just spelling it out)?
So that's where the name of the series comes from; I hope you enjoy the pieces!
🎨 Process
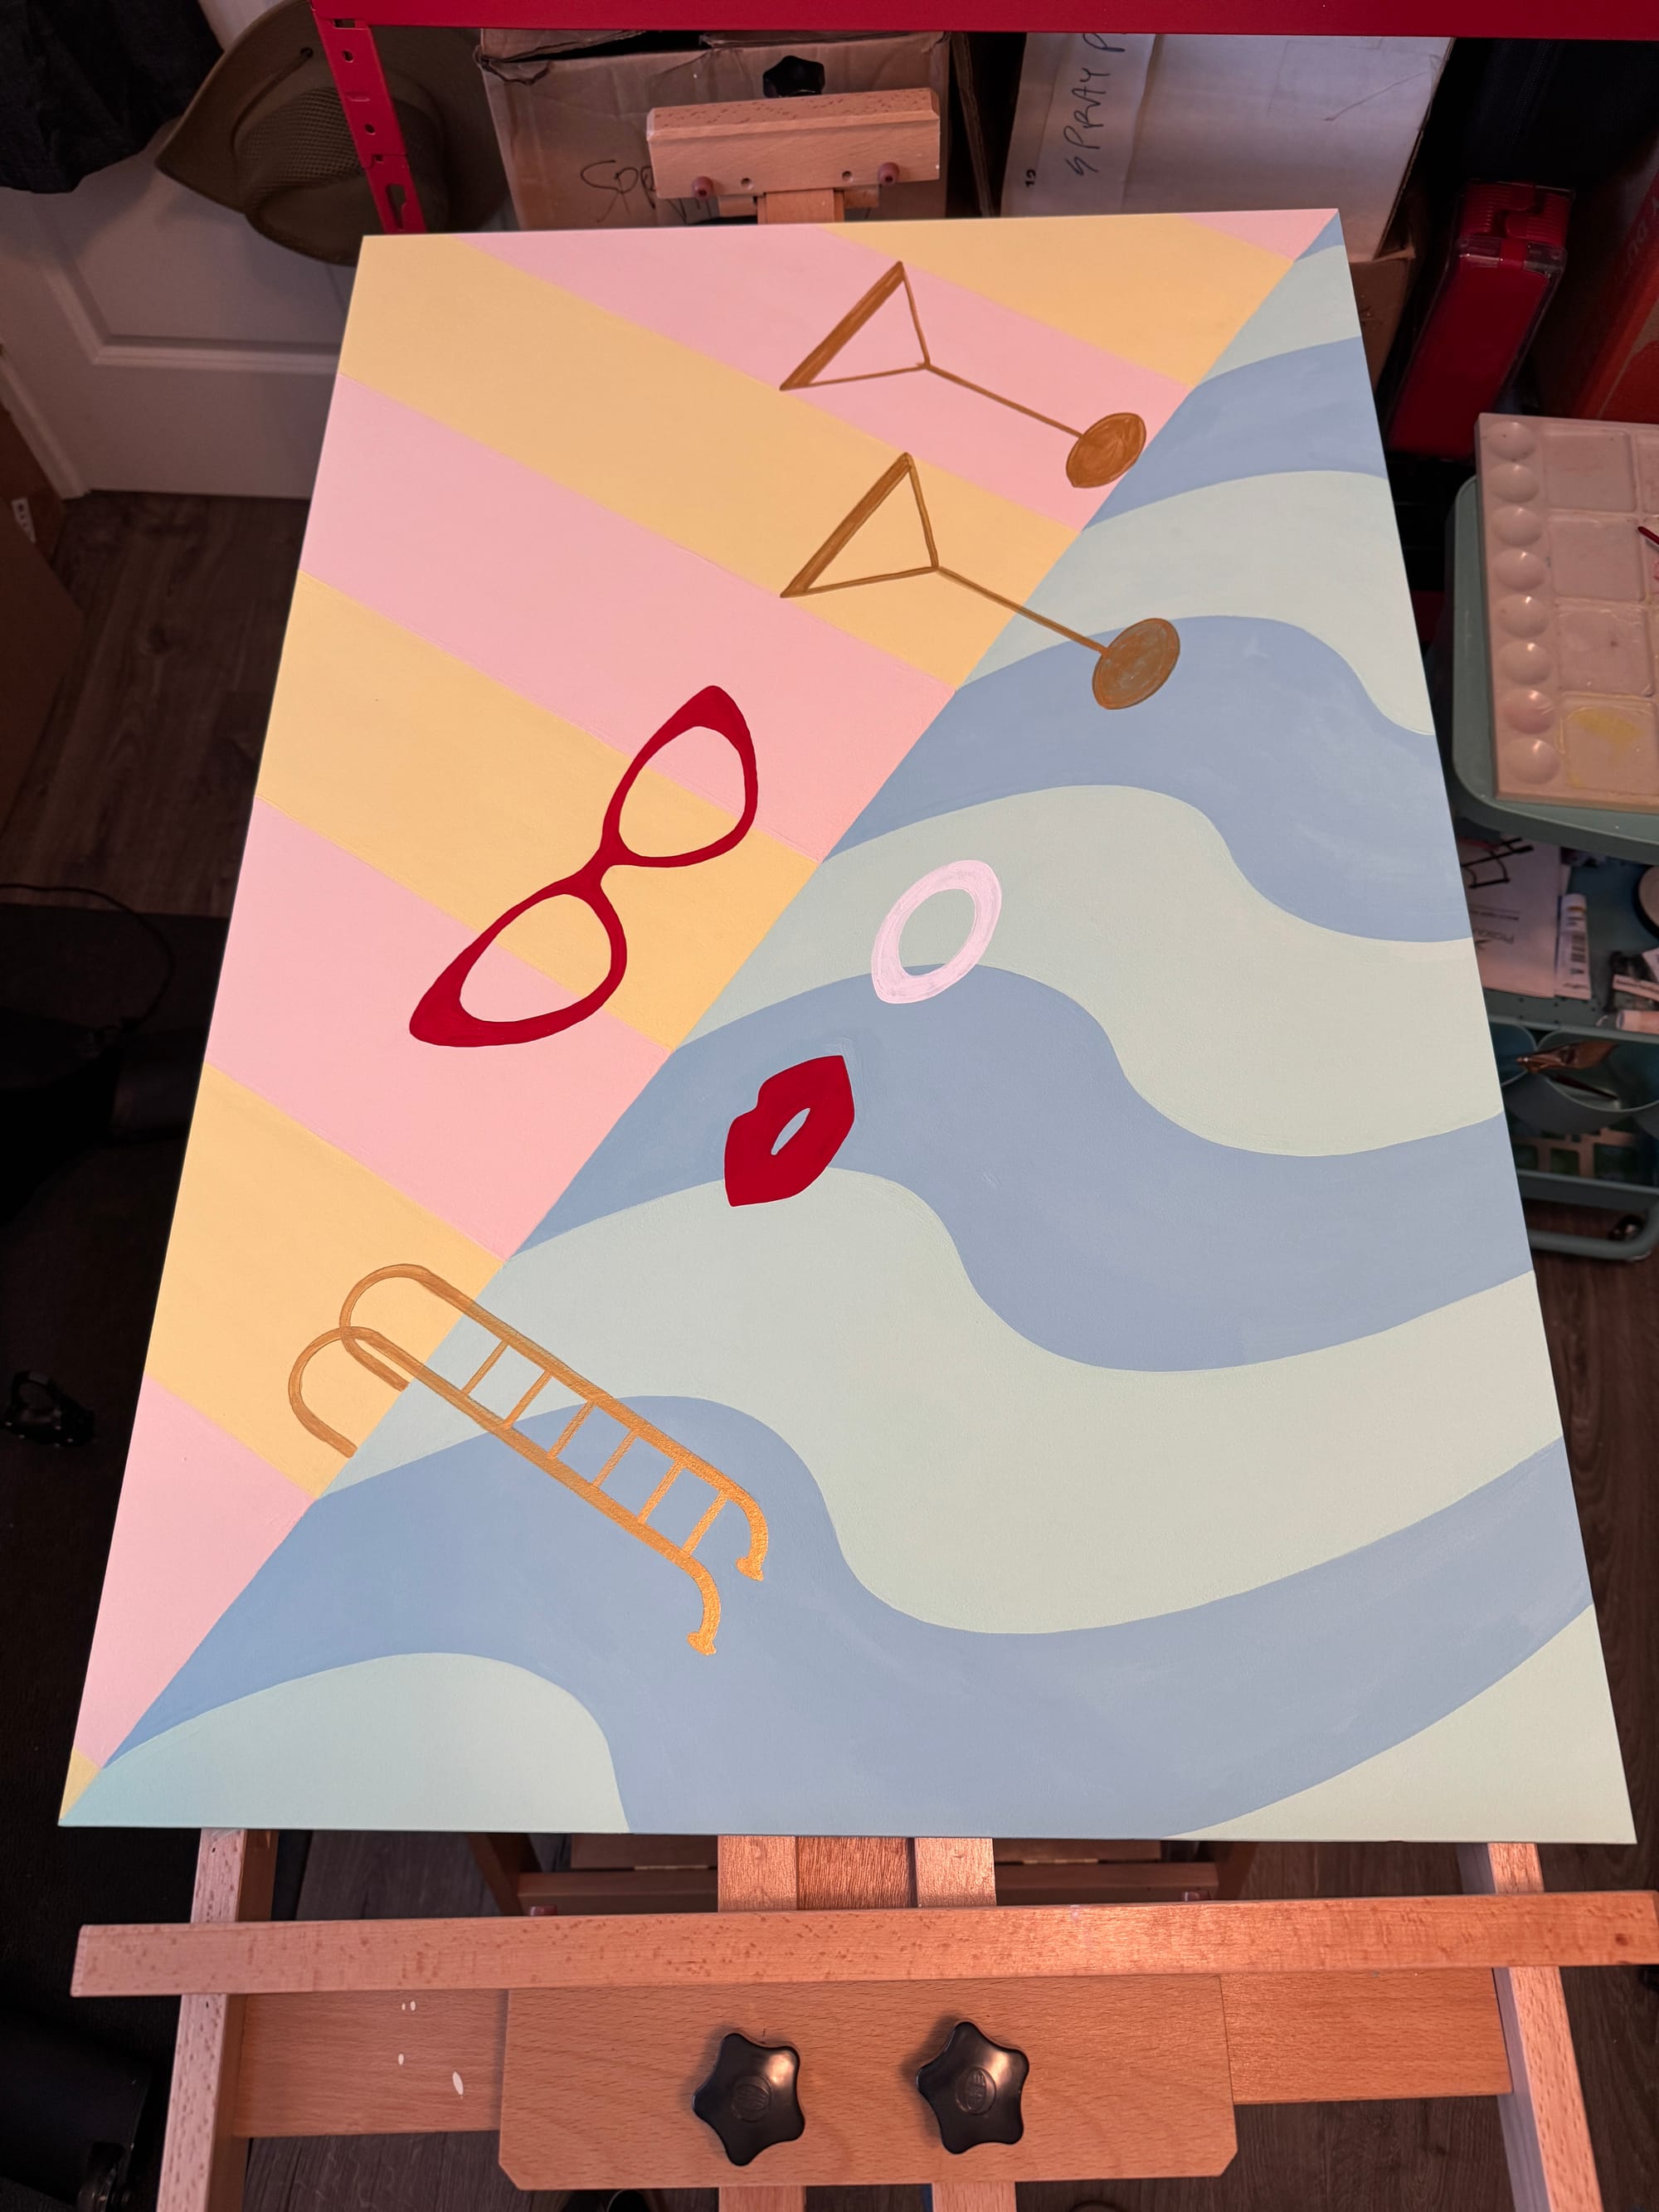
Since "day one", I knew this piece would have:
- Martinis 🍸
- Pool ephemera 🛟
- And a massive diagonal line going straight from corner to corner 📏
... that was in my head from the very beginning, and I knew those core elements wouldn't change.
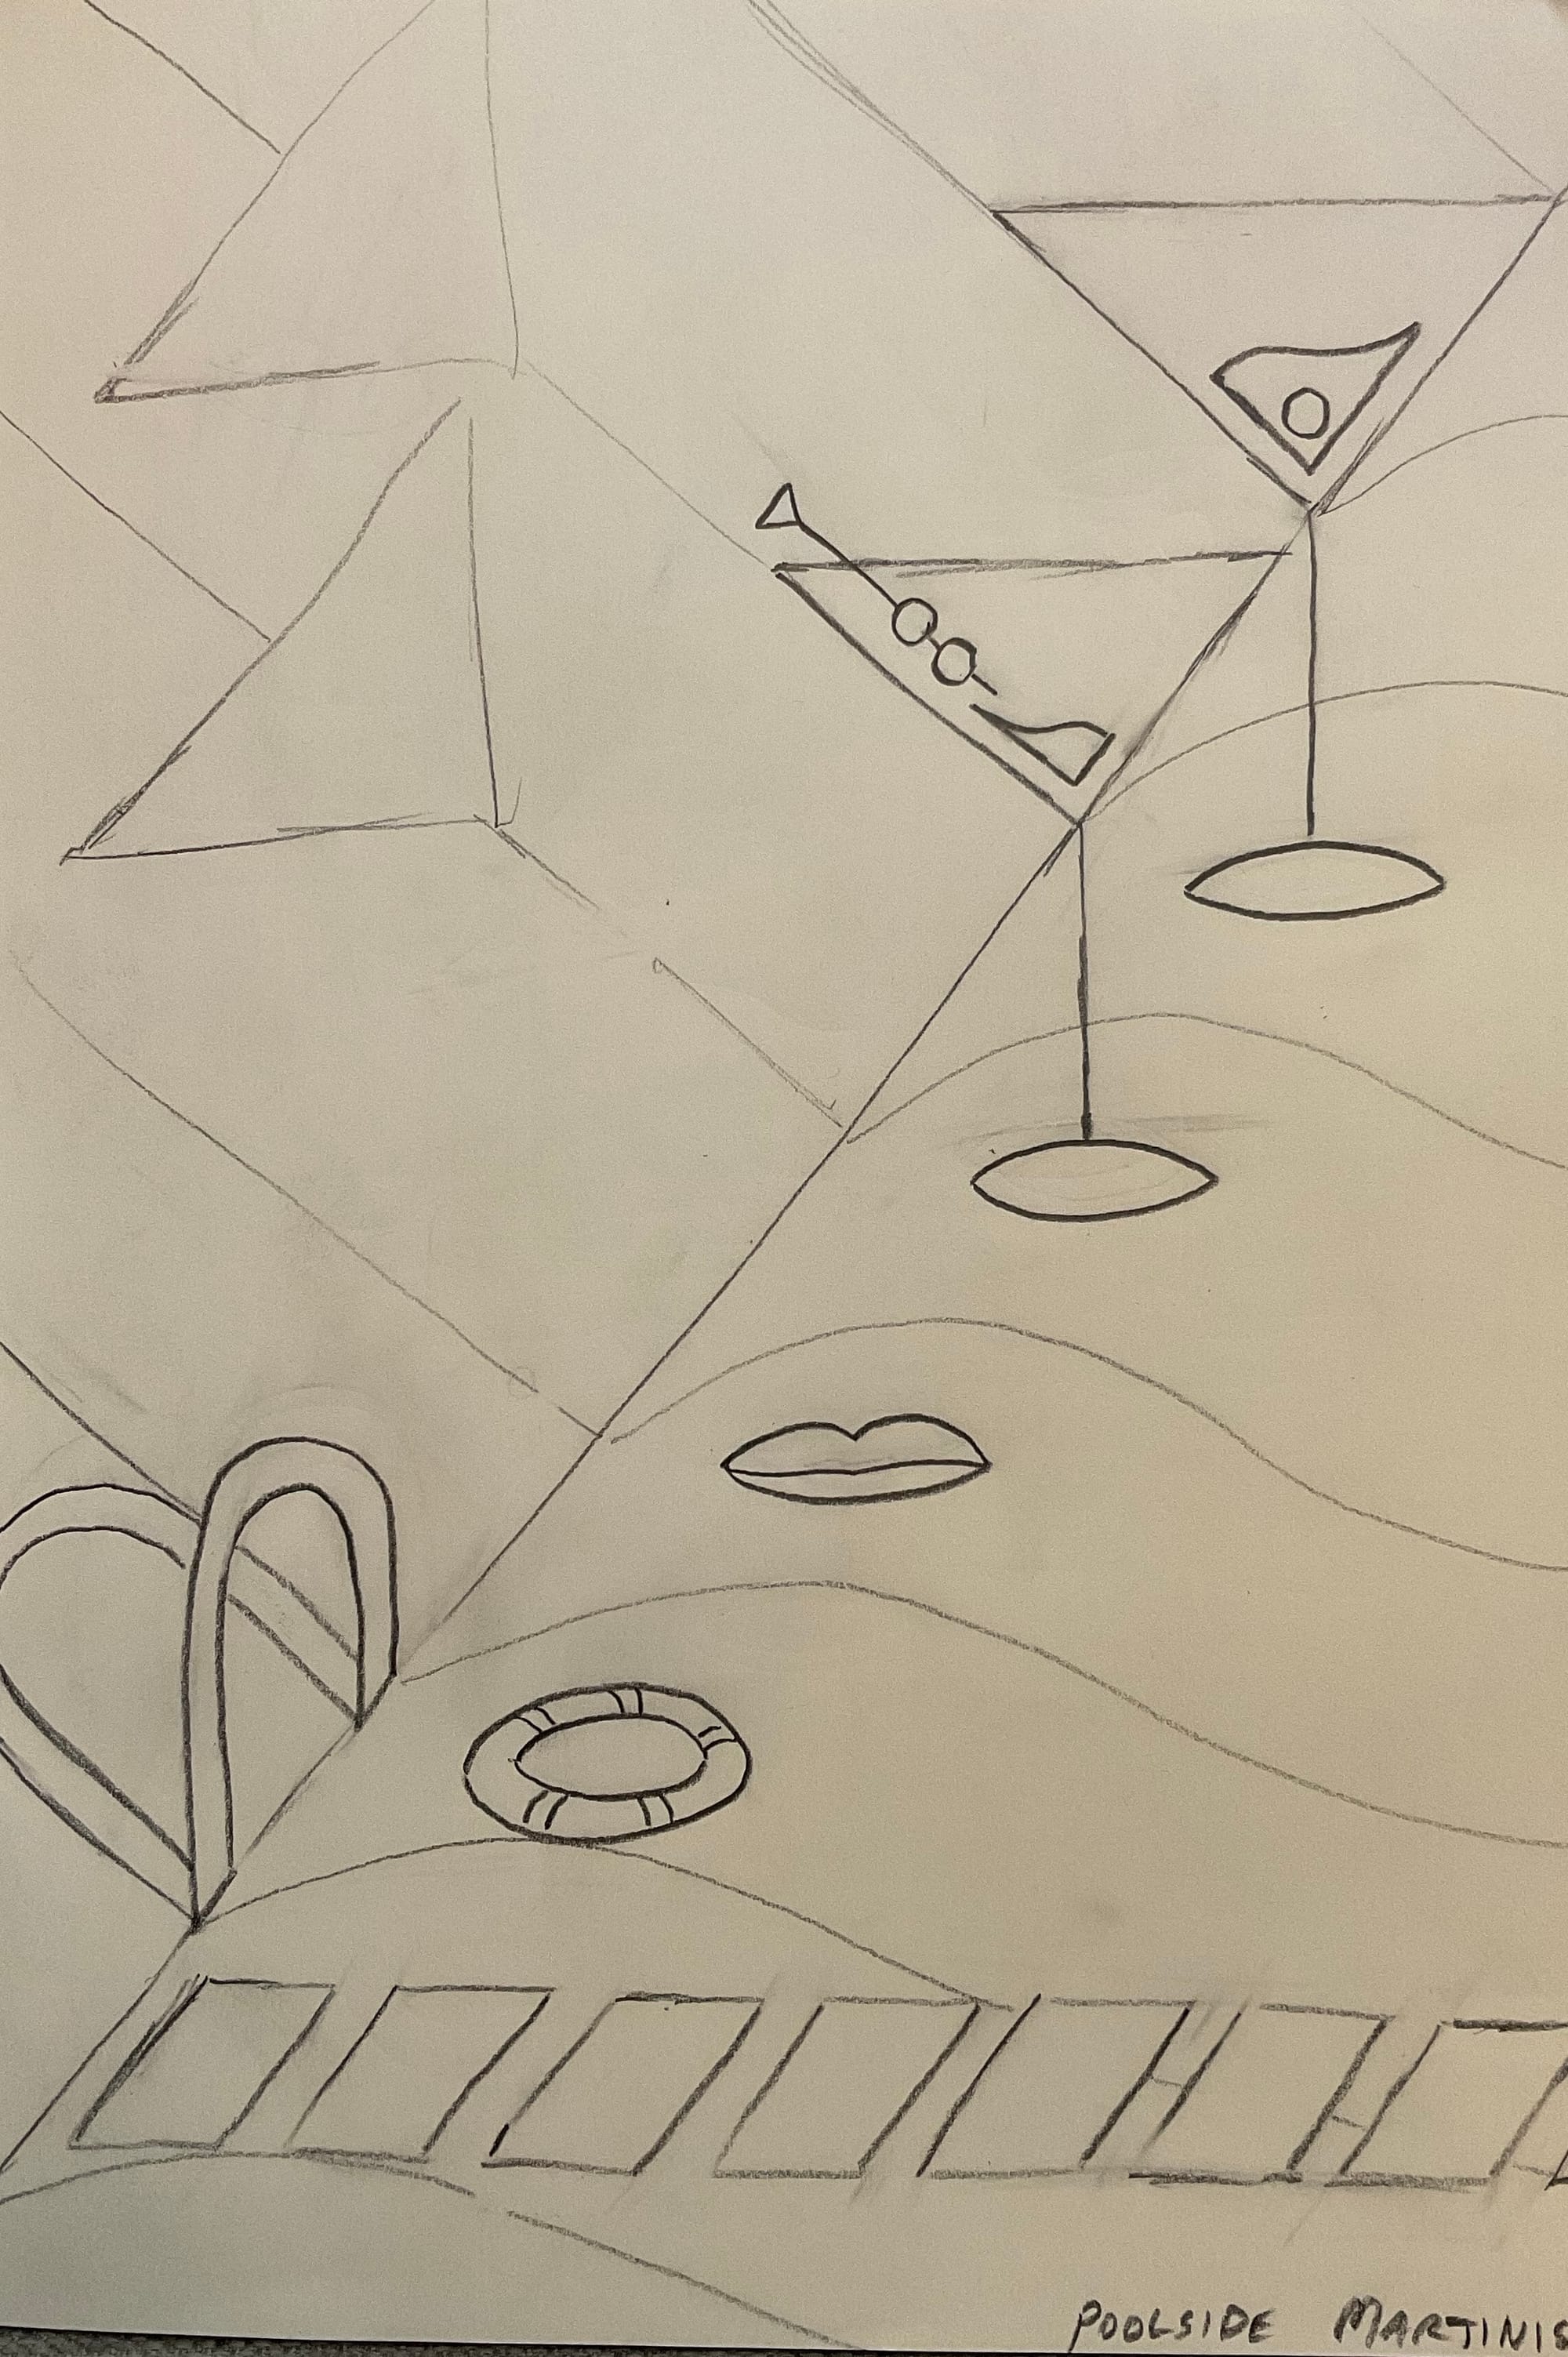
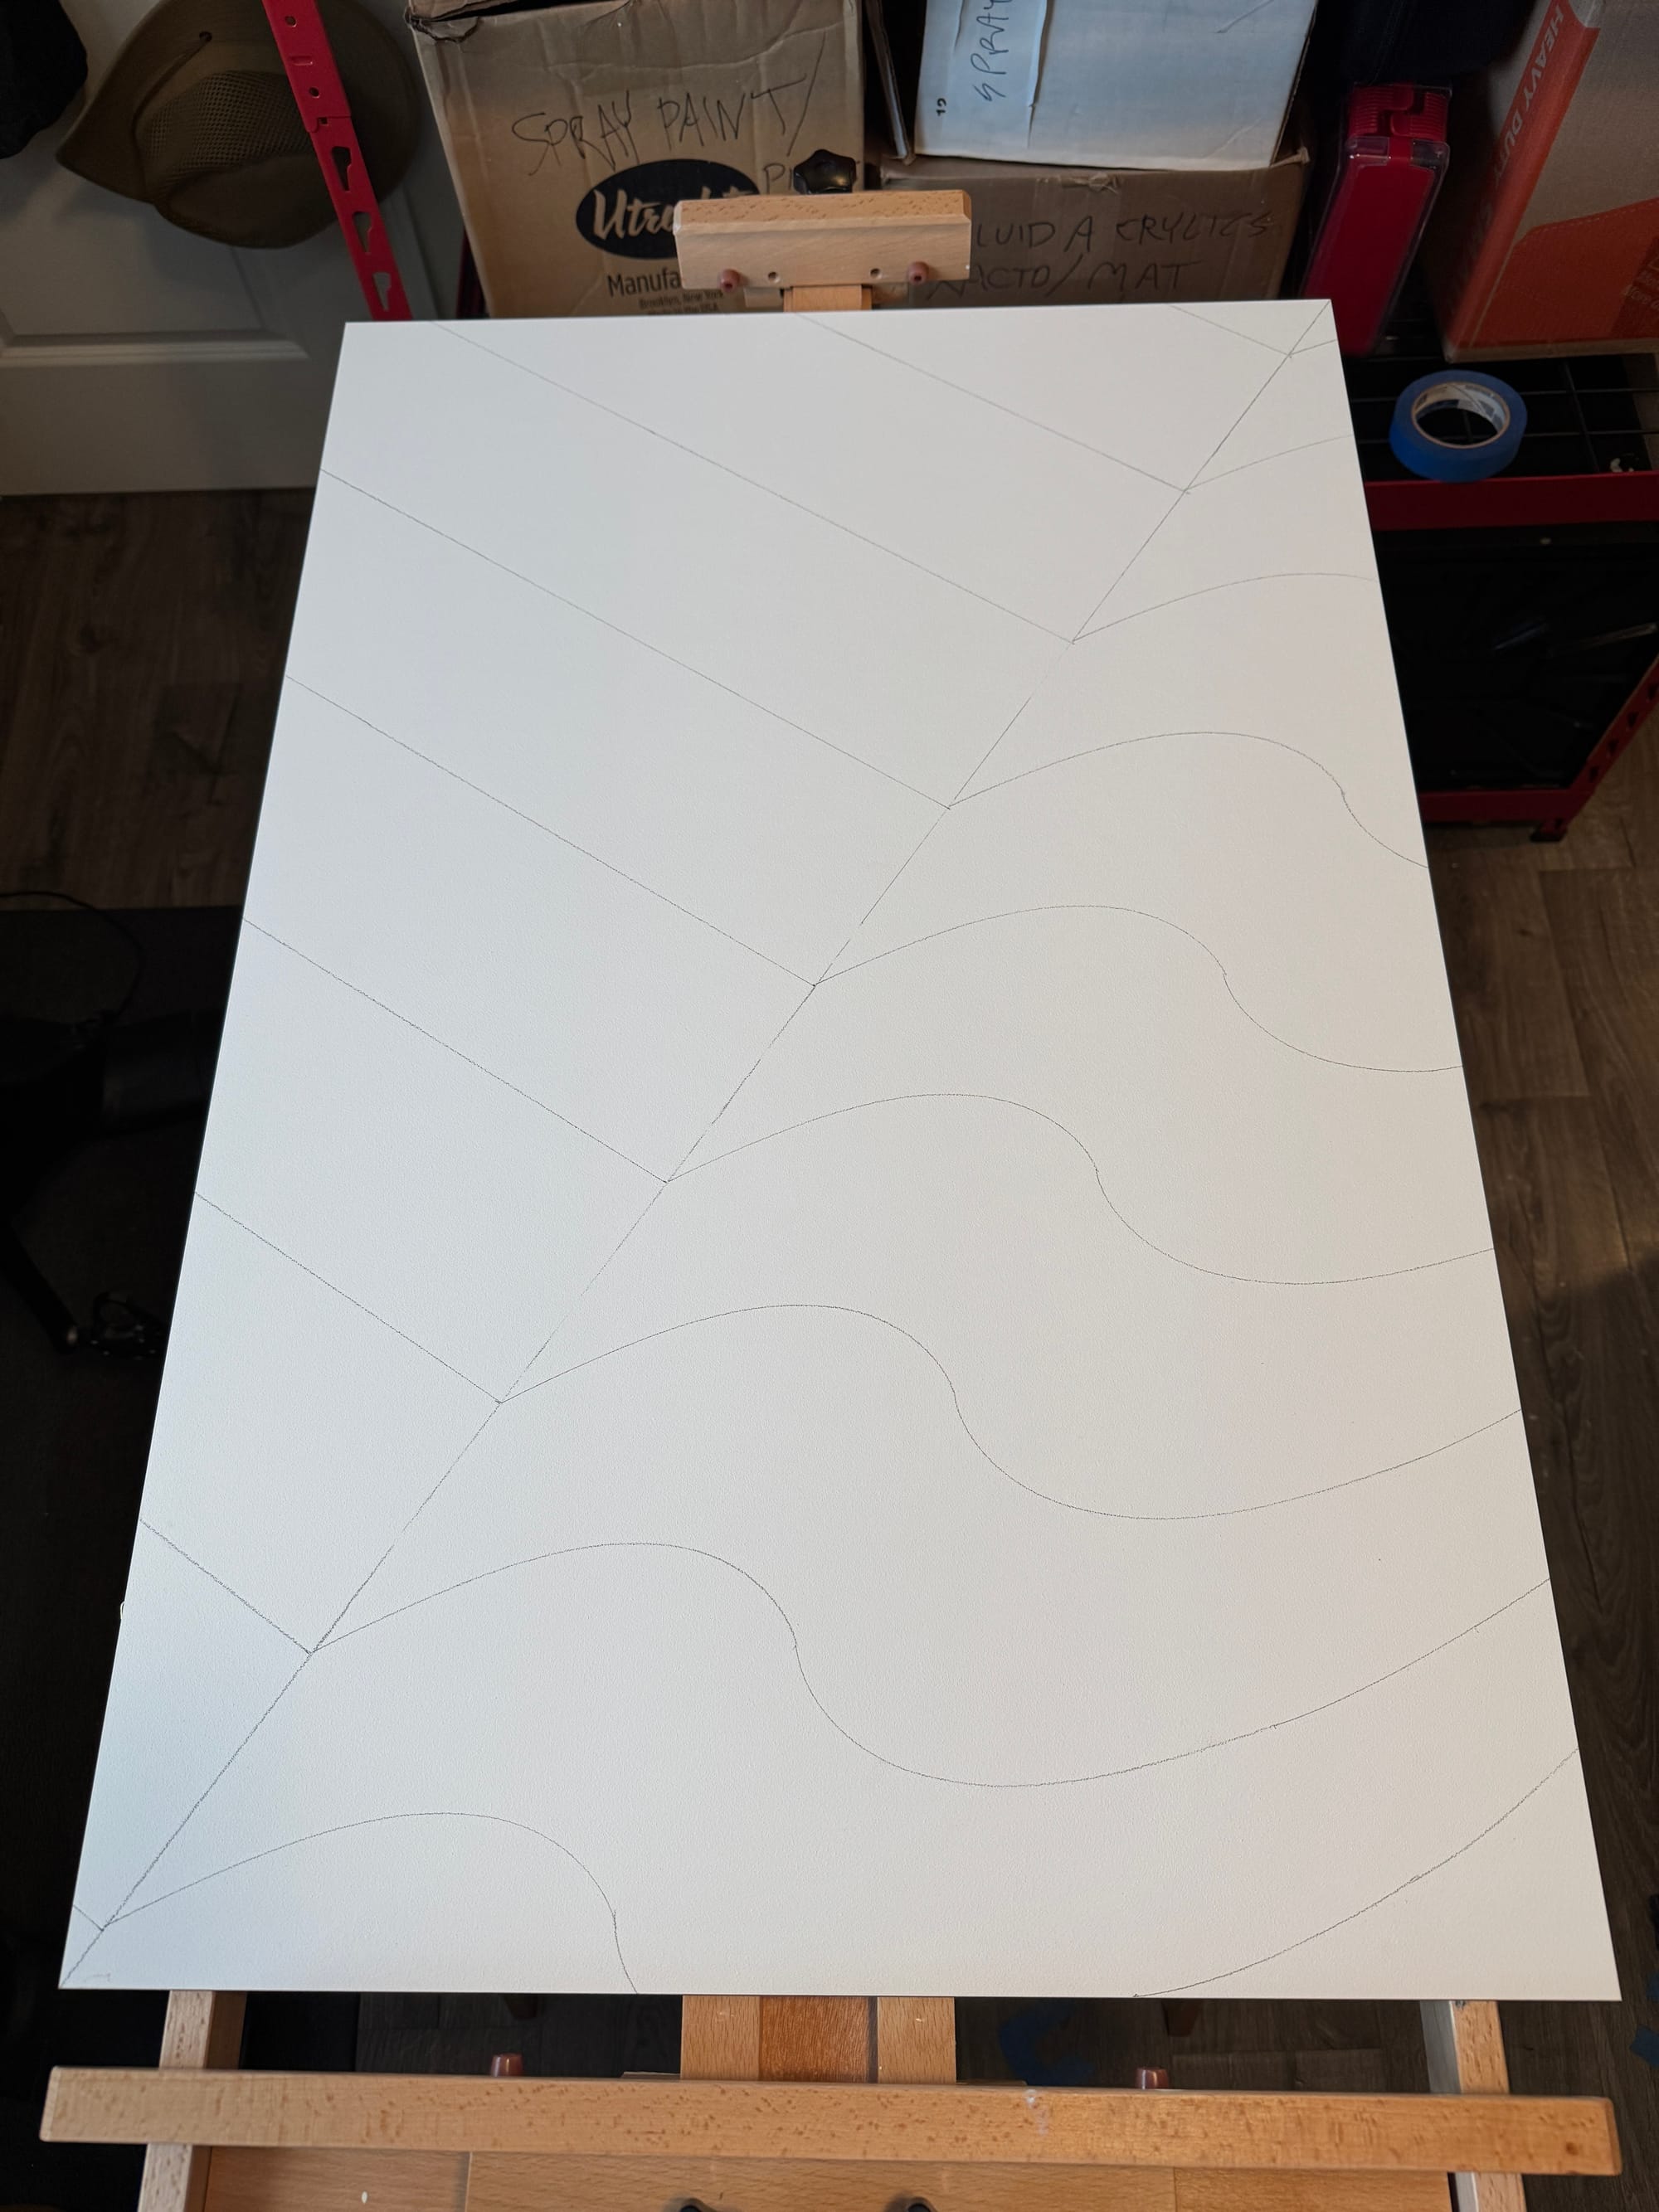
That said, I pretty much changed everything else about this composition (several times)! You'll notice in the original sketch above, the martini glasses are "vertical" (with a suggestion of their shadows as diagonal) and also there's a suggestion down at the bottom of a "stonework walking path" (like the kind you'd find around the perimeter of a pool)? I ultimately felt the martini glasses looked better following the lines of the "towel" background (at a 45 degree angle), & I scrapped the stonework altogether.
Here's a time-lapse video of the color treatments I played around with, and ultimately, I also used the digital app Procreate to help me test out different versions of the compositions, different weights of objects, different objects entirely, etc:
0:00
/0:29
Timelapse video of rough color & composition tests for Poolside Martinis (using Procreate app)
From there, I wanted to bridge the gap between digital & analog & start testing real paint colors with swatches ... sometimes colors can look a certain way on the outside of a tube, & then look a completely different when they dry on a canvas, & then look different (again) when mixed wet with other colors, so I often like to see what I'm dealing with (using paint swatches) before I tackle the main composition.

You’ll see in the above swatch test that the ”coral” color (for example) was not used in the final piece. It was a hard call to make, but ultimately I leaned towards softer shades, while still preserving a high-impact (yet a touch darker and more rich) red in the foreground.
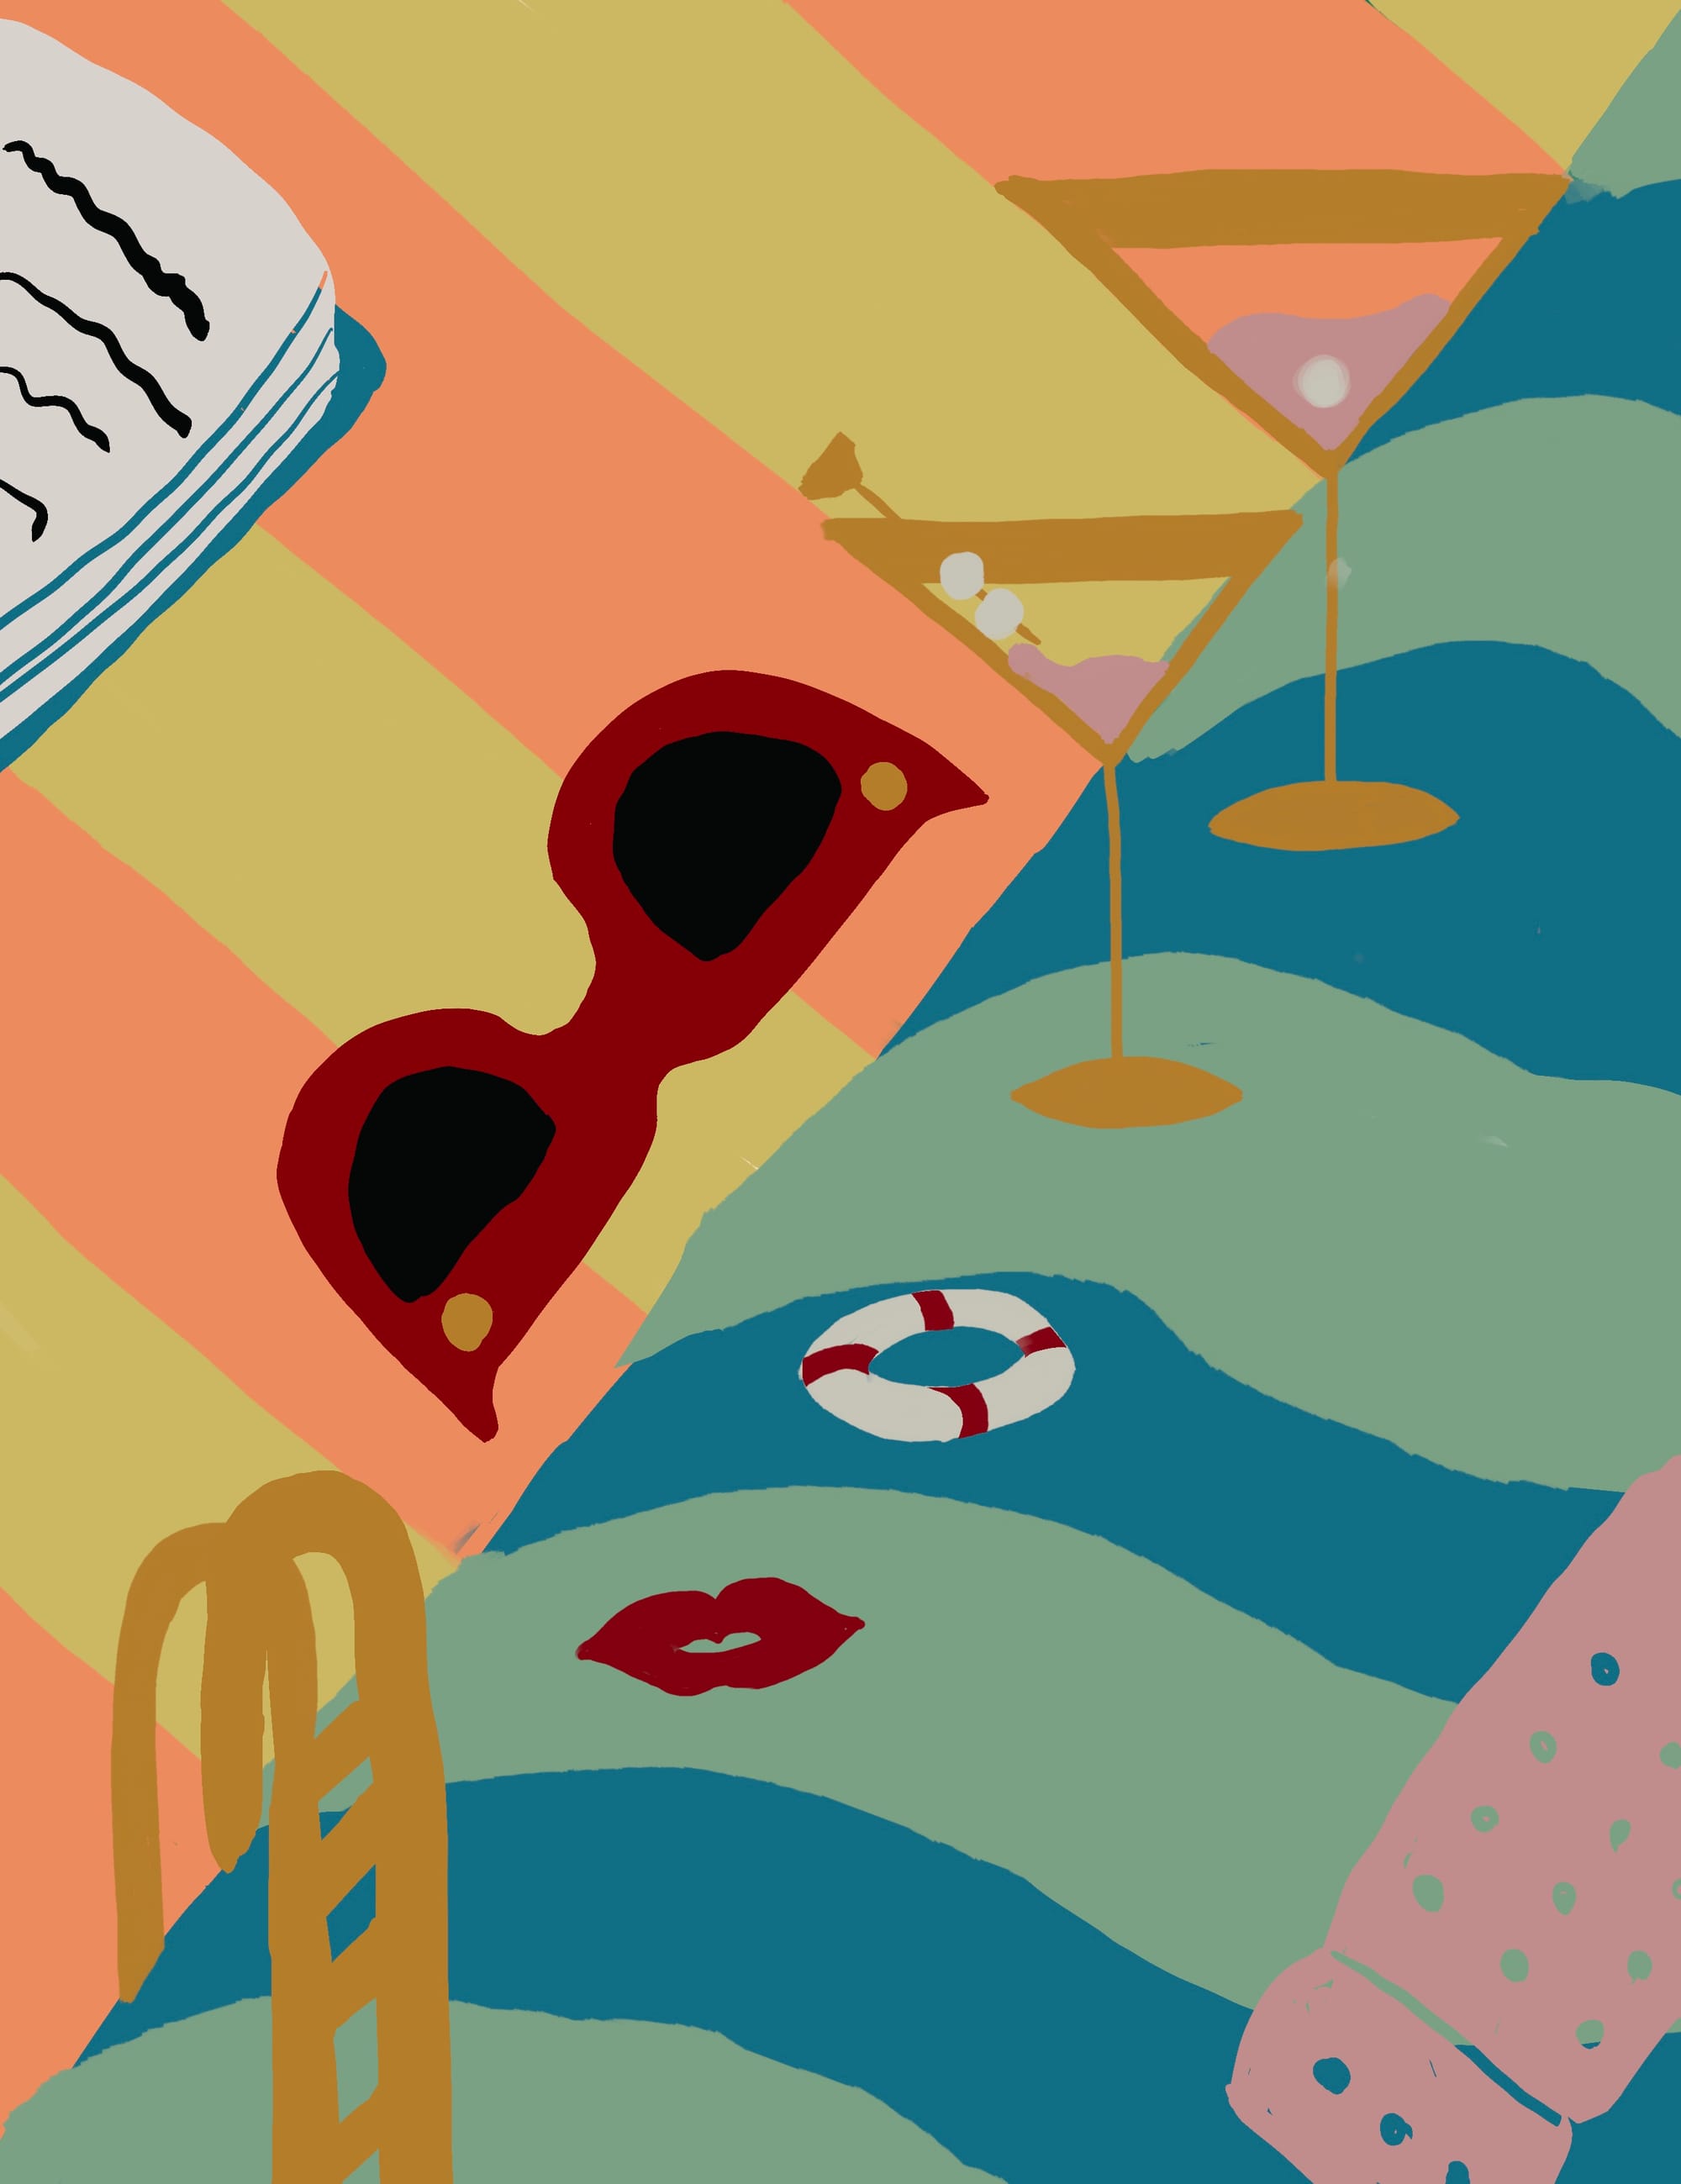
As seen in the above early / rough color treatment, I did experiment with a “coral / yellow” towel for the background, but ultimately opted for a softer “pink / yellow” towel …
After feeling out the colors, I wanted to start mapping this out not the board. I had a straight edge to draw long lines with, but it wasn’t long enough to go from corner to corner, so I relied on masking tape for that instead.
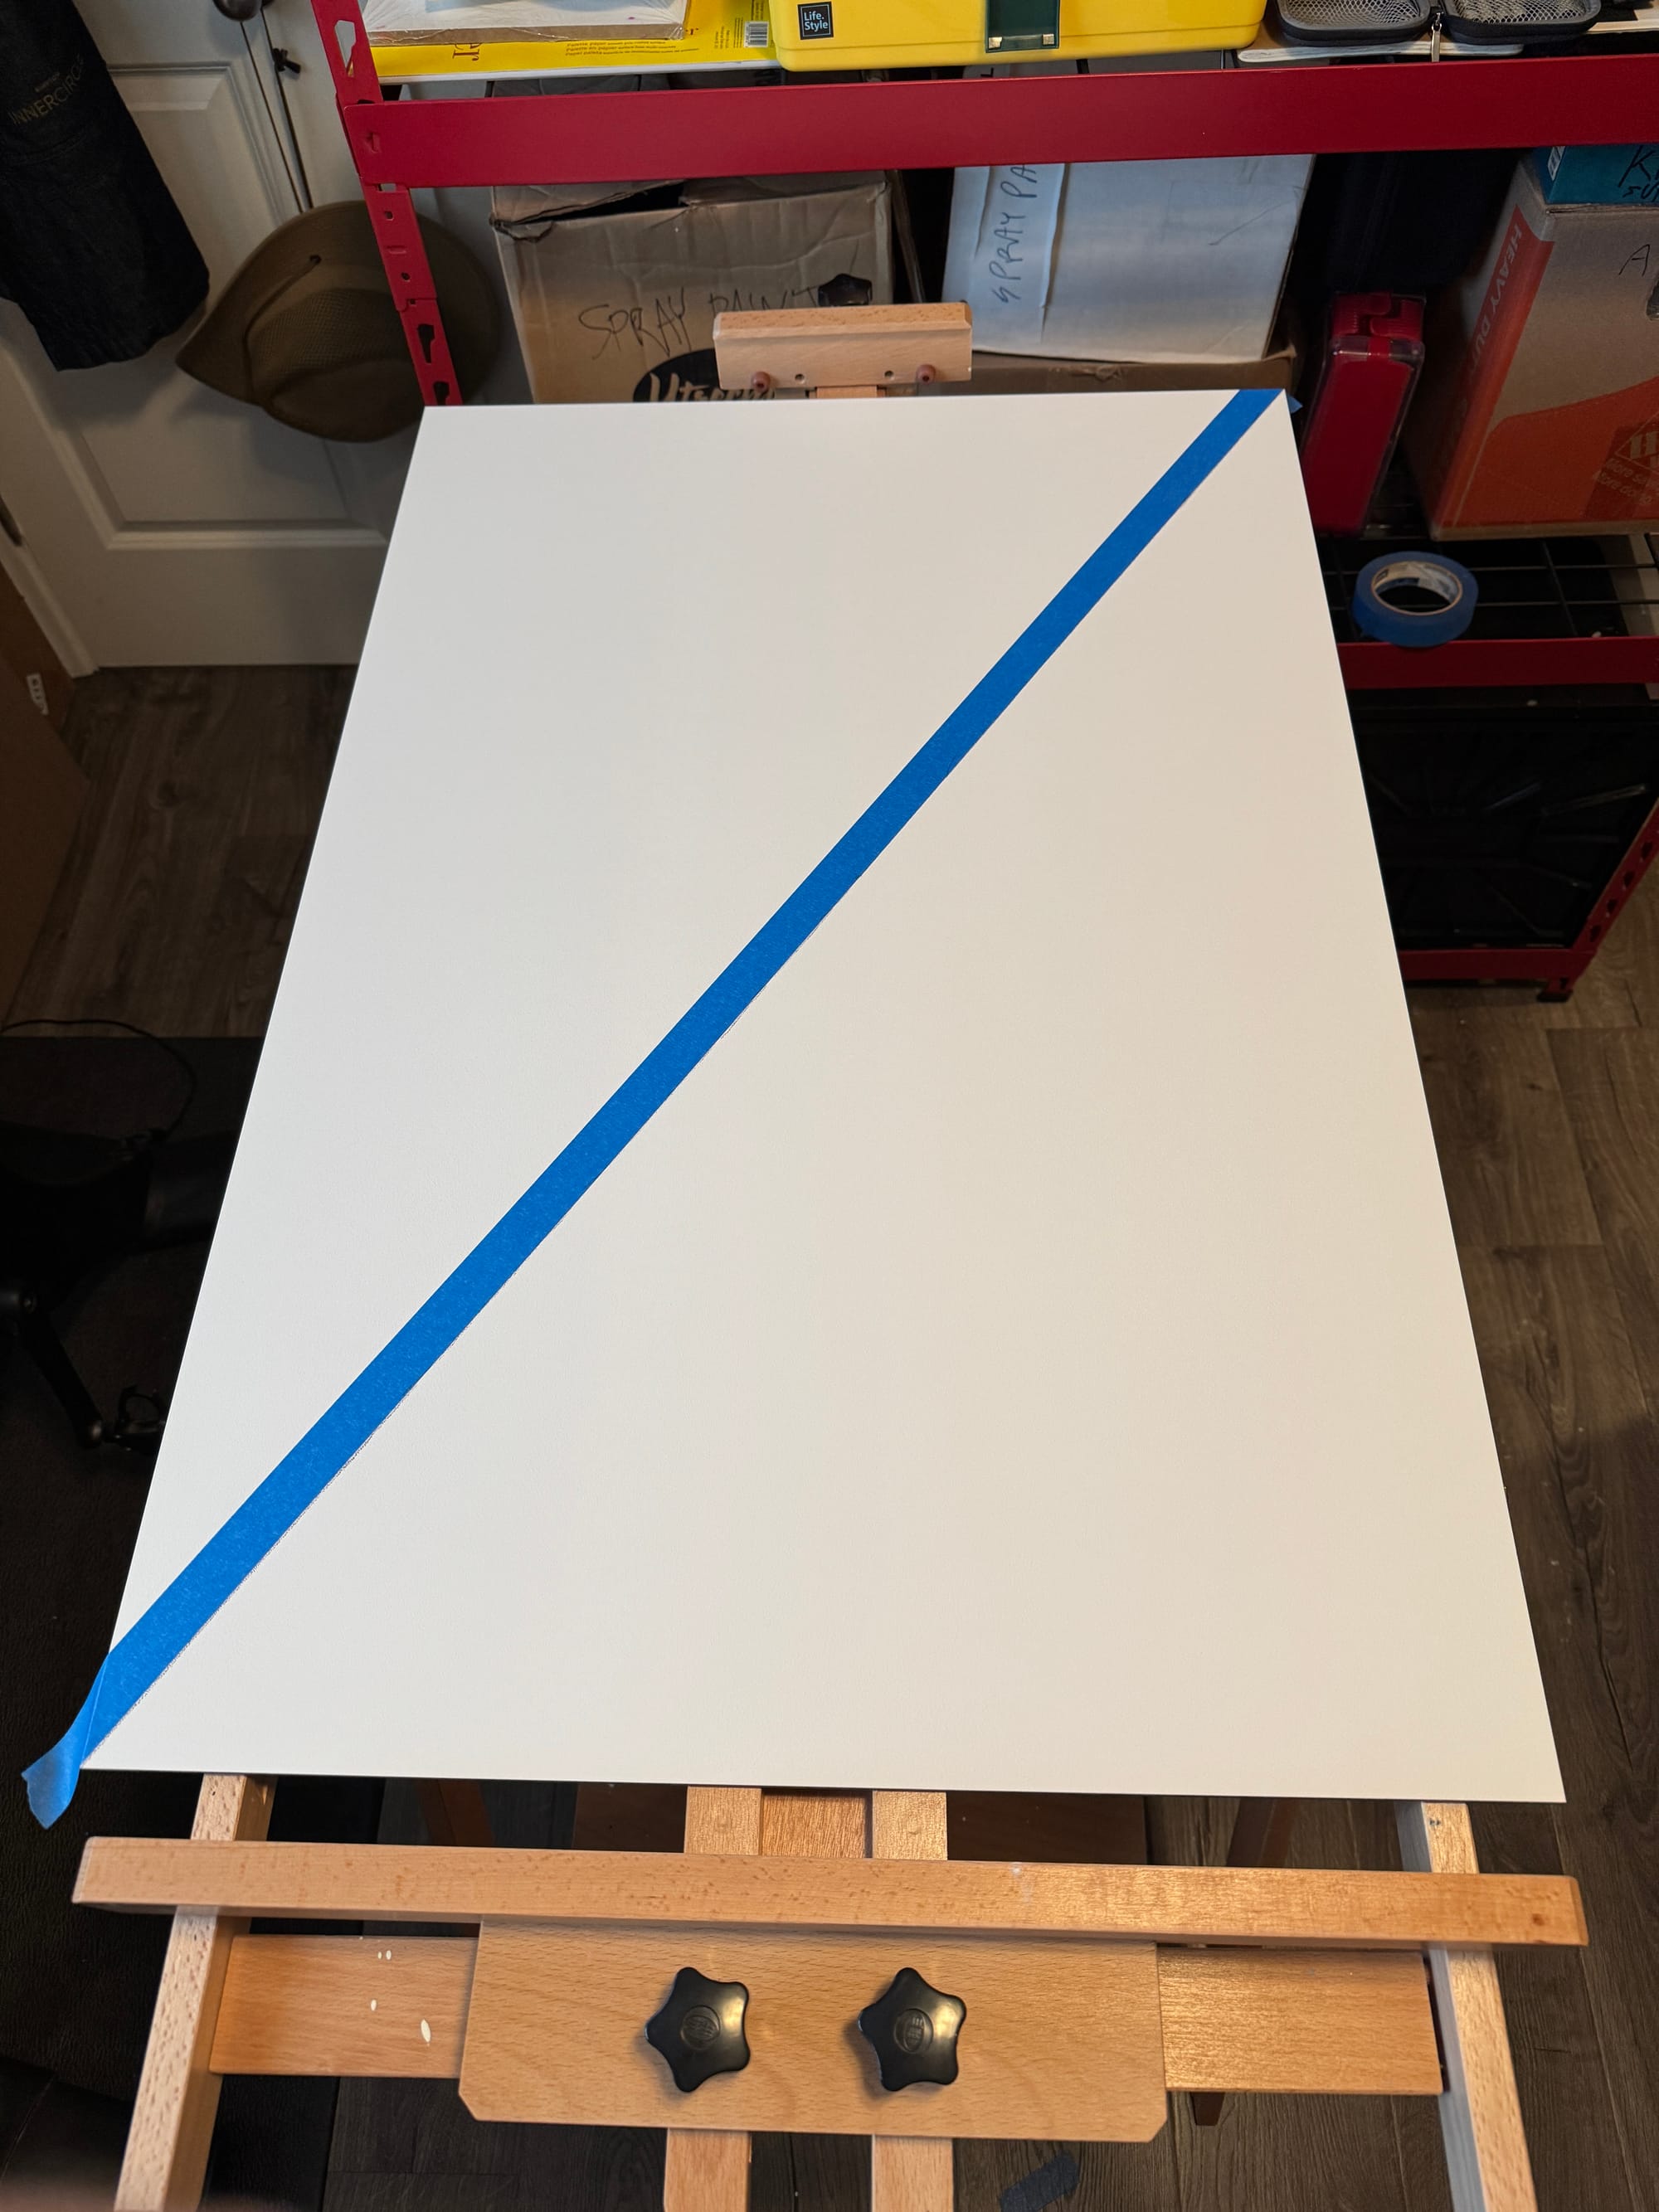
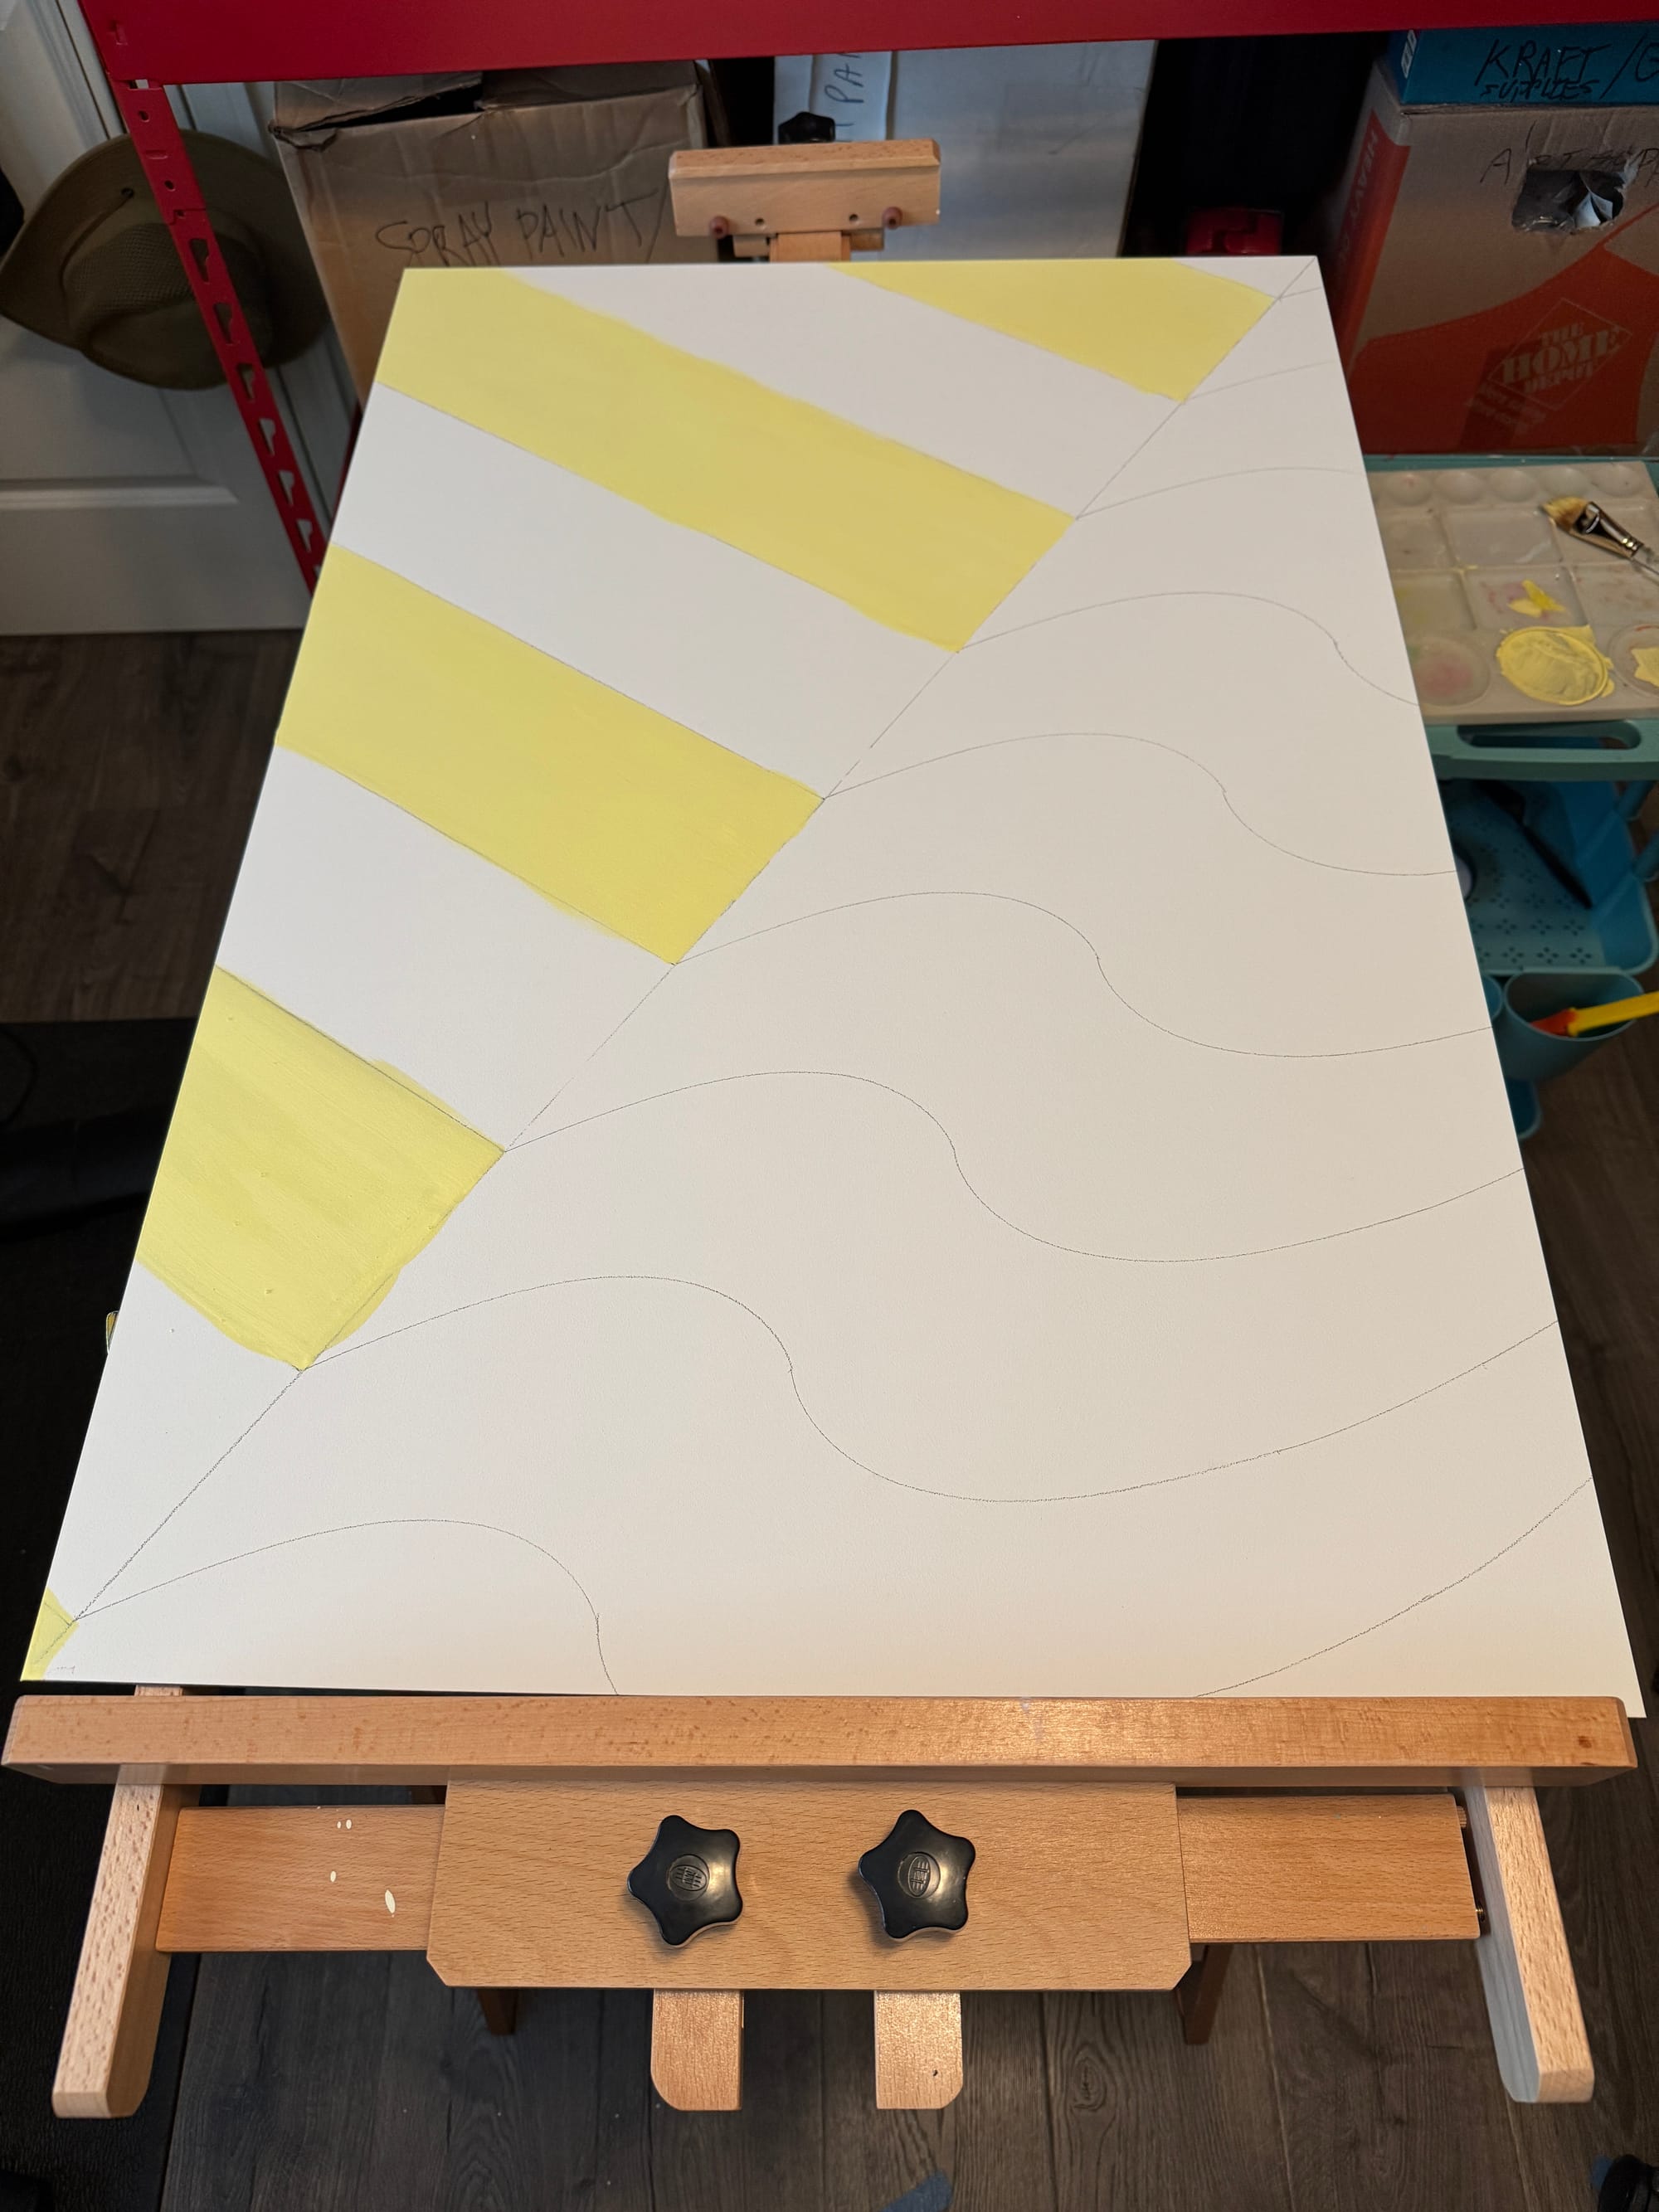
Pencilling this dividing line in, I was then able to start working on both sides of the composition. I imagined the left side was reminiscent of an “oxford towel” (you know, the fancy striped ones you get at a nice hotel pool) and the right side would conjure up vibes of a “pool”.
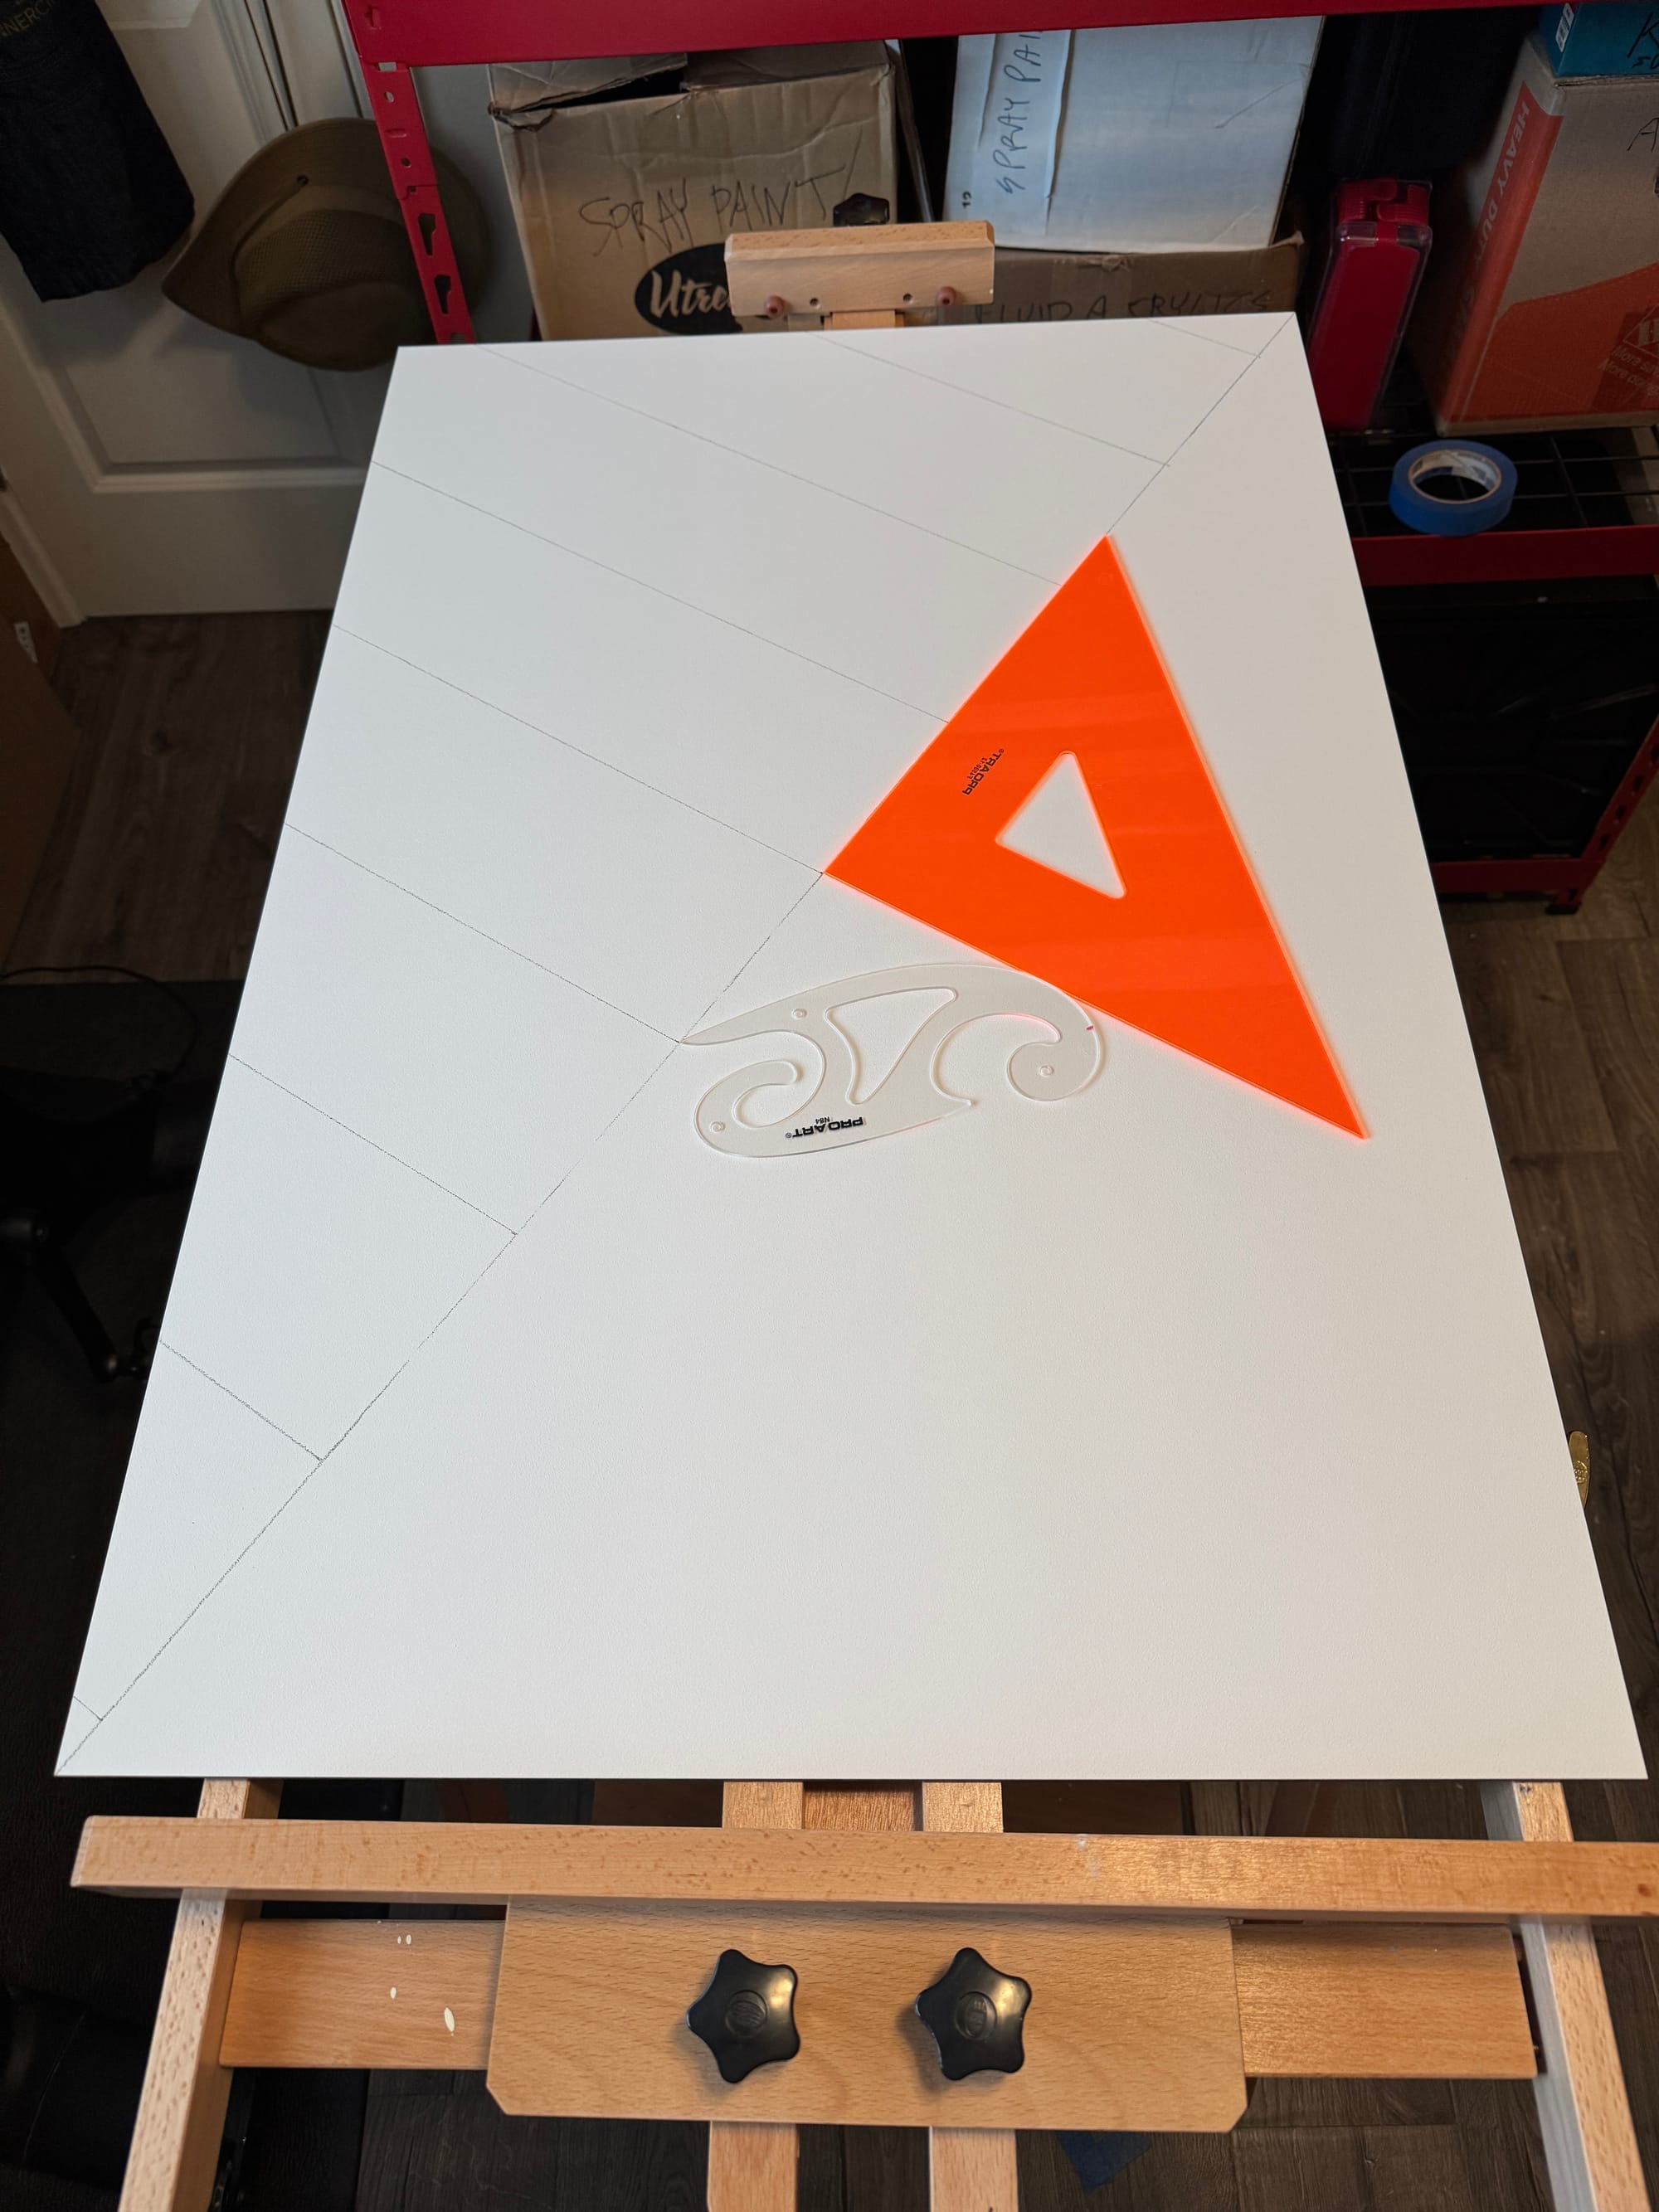
I wanted to keep the measurements pretty precise (or at least, proportional) so I leaned on my old friends the “triangle“ and the “French curve” to map out this territory.
Now that the background was scoped out, I could start laying out some colors. Again, I opted for softer colors in the background, and more prominent colors in the foreground.
It took a few layers and quite a bit of touch-up to get the layers how I wanted them …
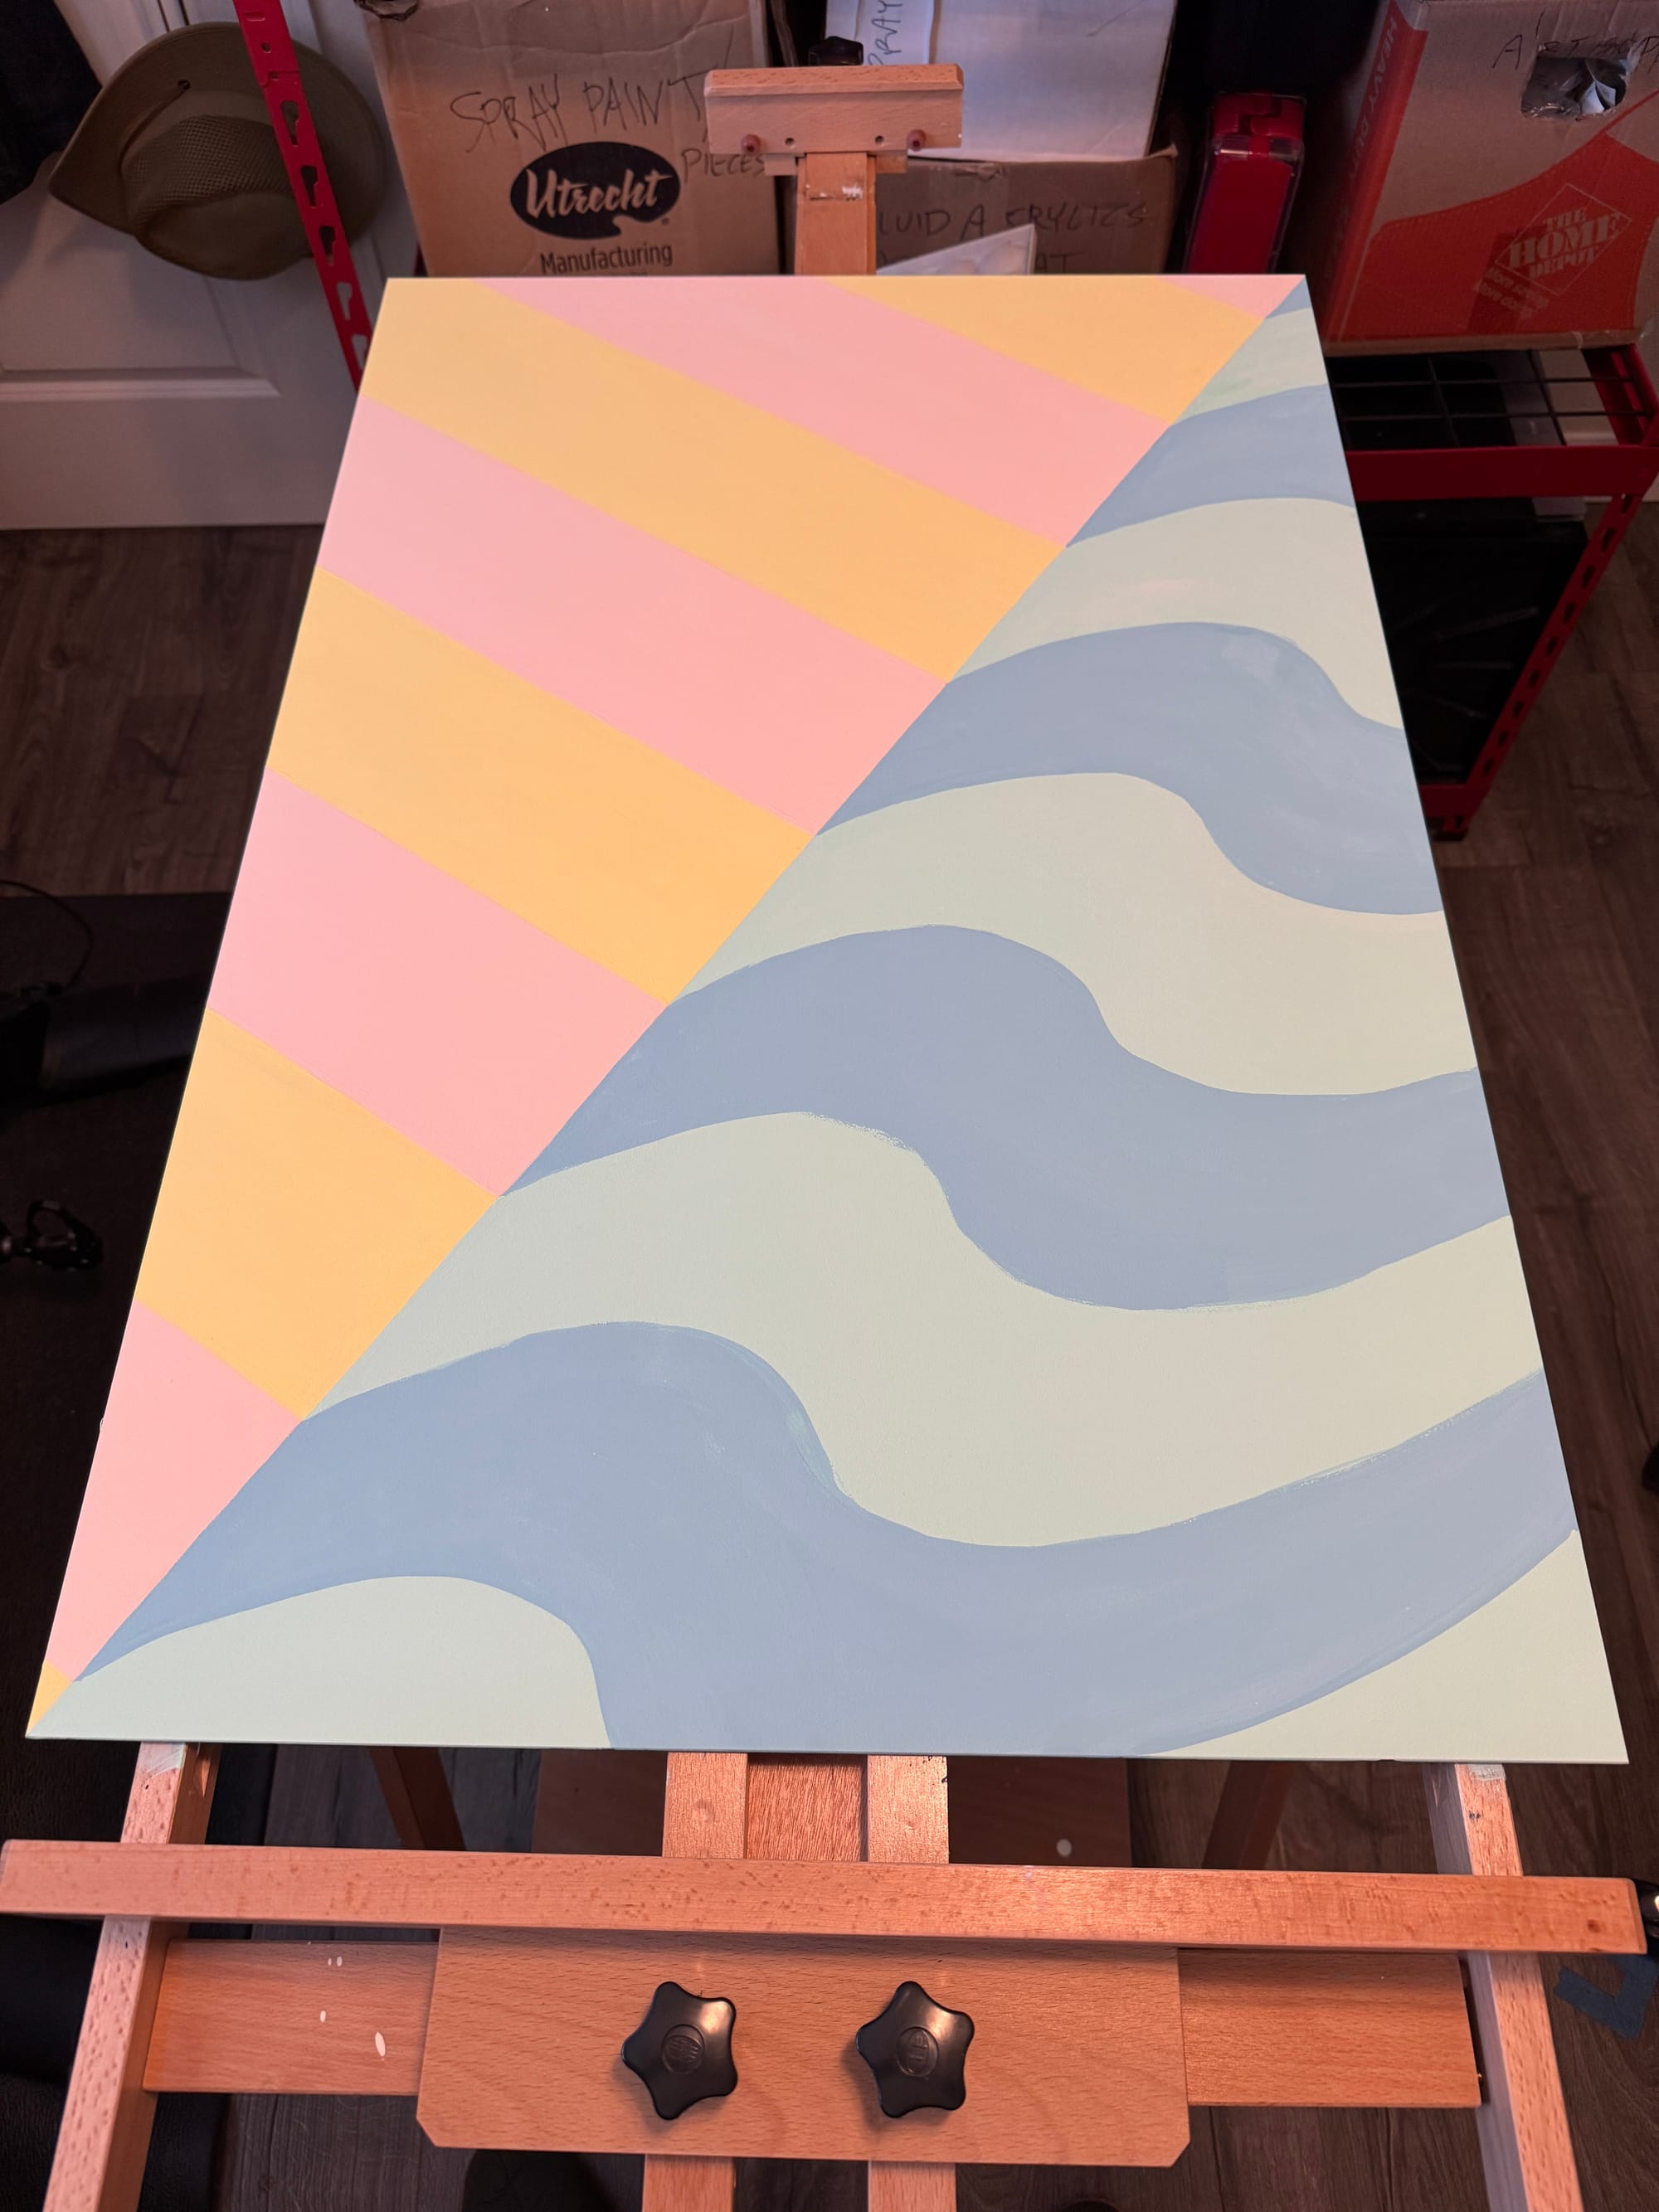
... but eventually, I locked in the background & was ready to move into the foreground.
For me, perhaps the most intimidating part of this piece that I had to get right where the martinis themselves ... So first I started by roughing them in, and before I finished them, I also chose to rough in the pair of reading glasses next to it (so I could have a better idea of space, where the other elements go, etc). For the martinis, I chose a "bi-level" approach; I wanted to stagger the martinis, and have one be "outside the pool" and one "inside the pool", suggesting these can be sipped in either location. It also provides a nice smooth curve to the composition, leading your eye towards the glasses and other elements ...
Those cool “cat-eye” glasses? They were inspired by “old Hollywood”, specifically a frame by Caddis Eyewear called “Nepetalactone” (which has since been discontinued).

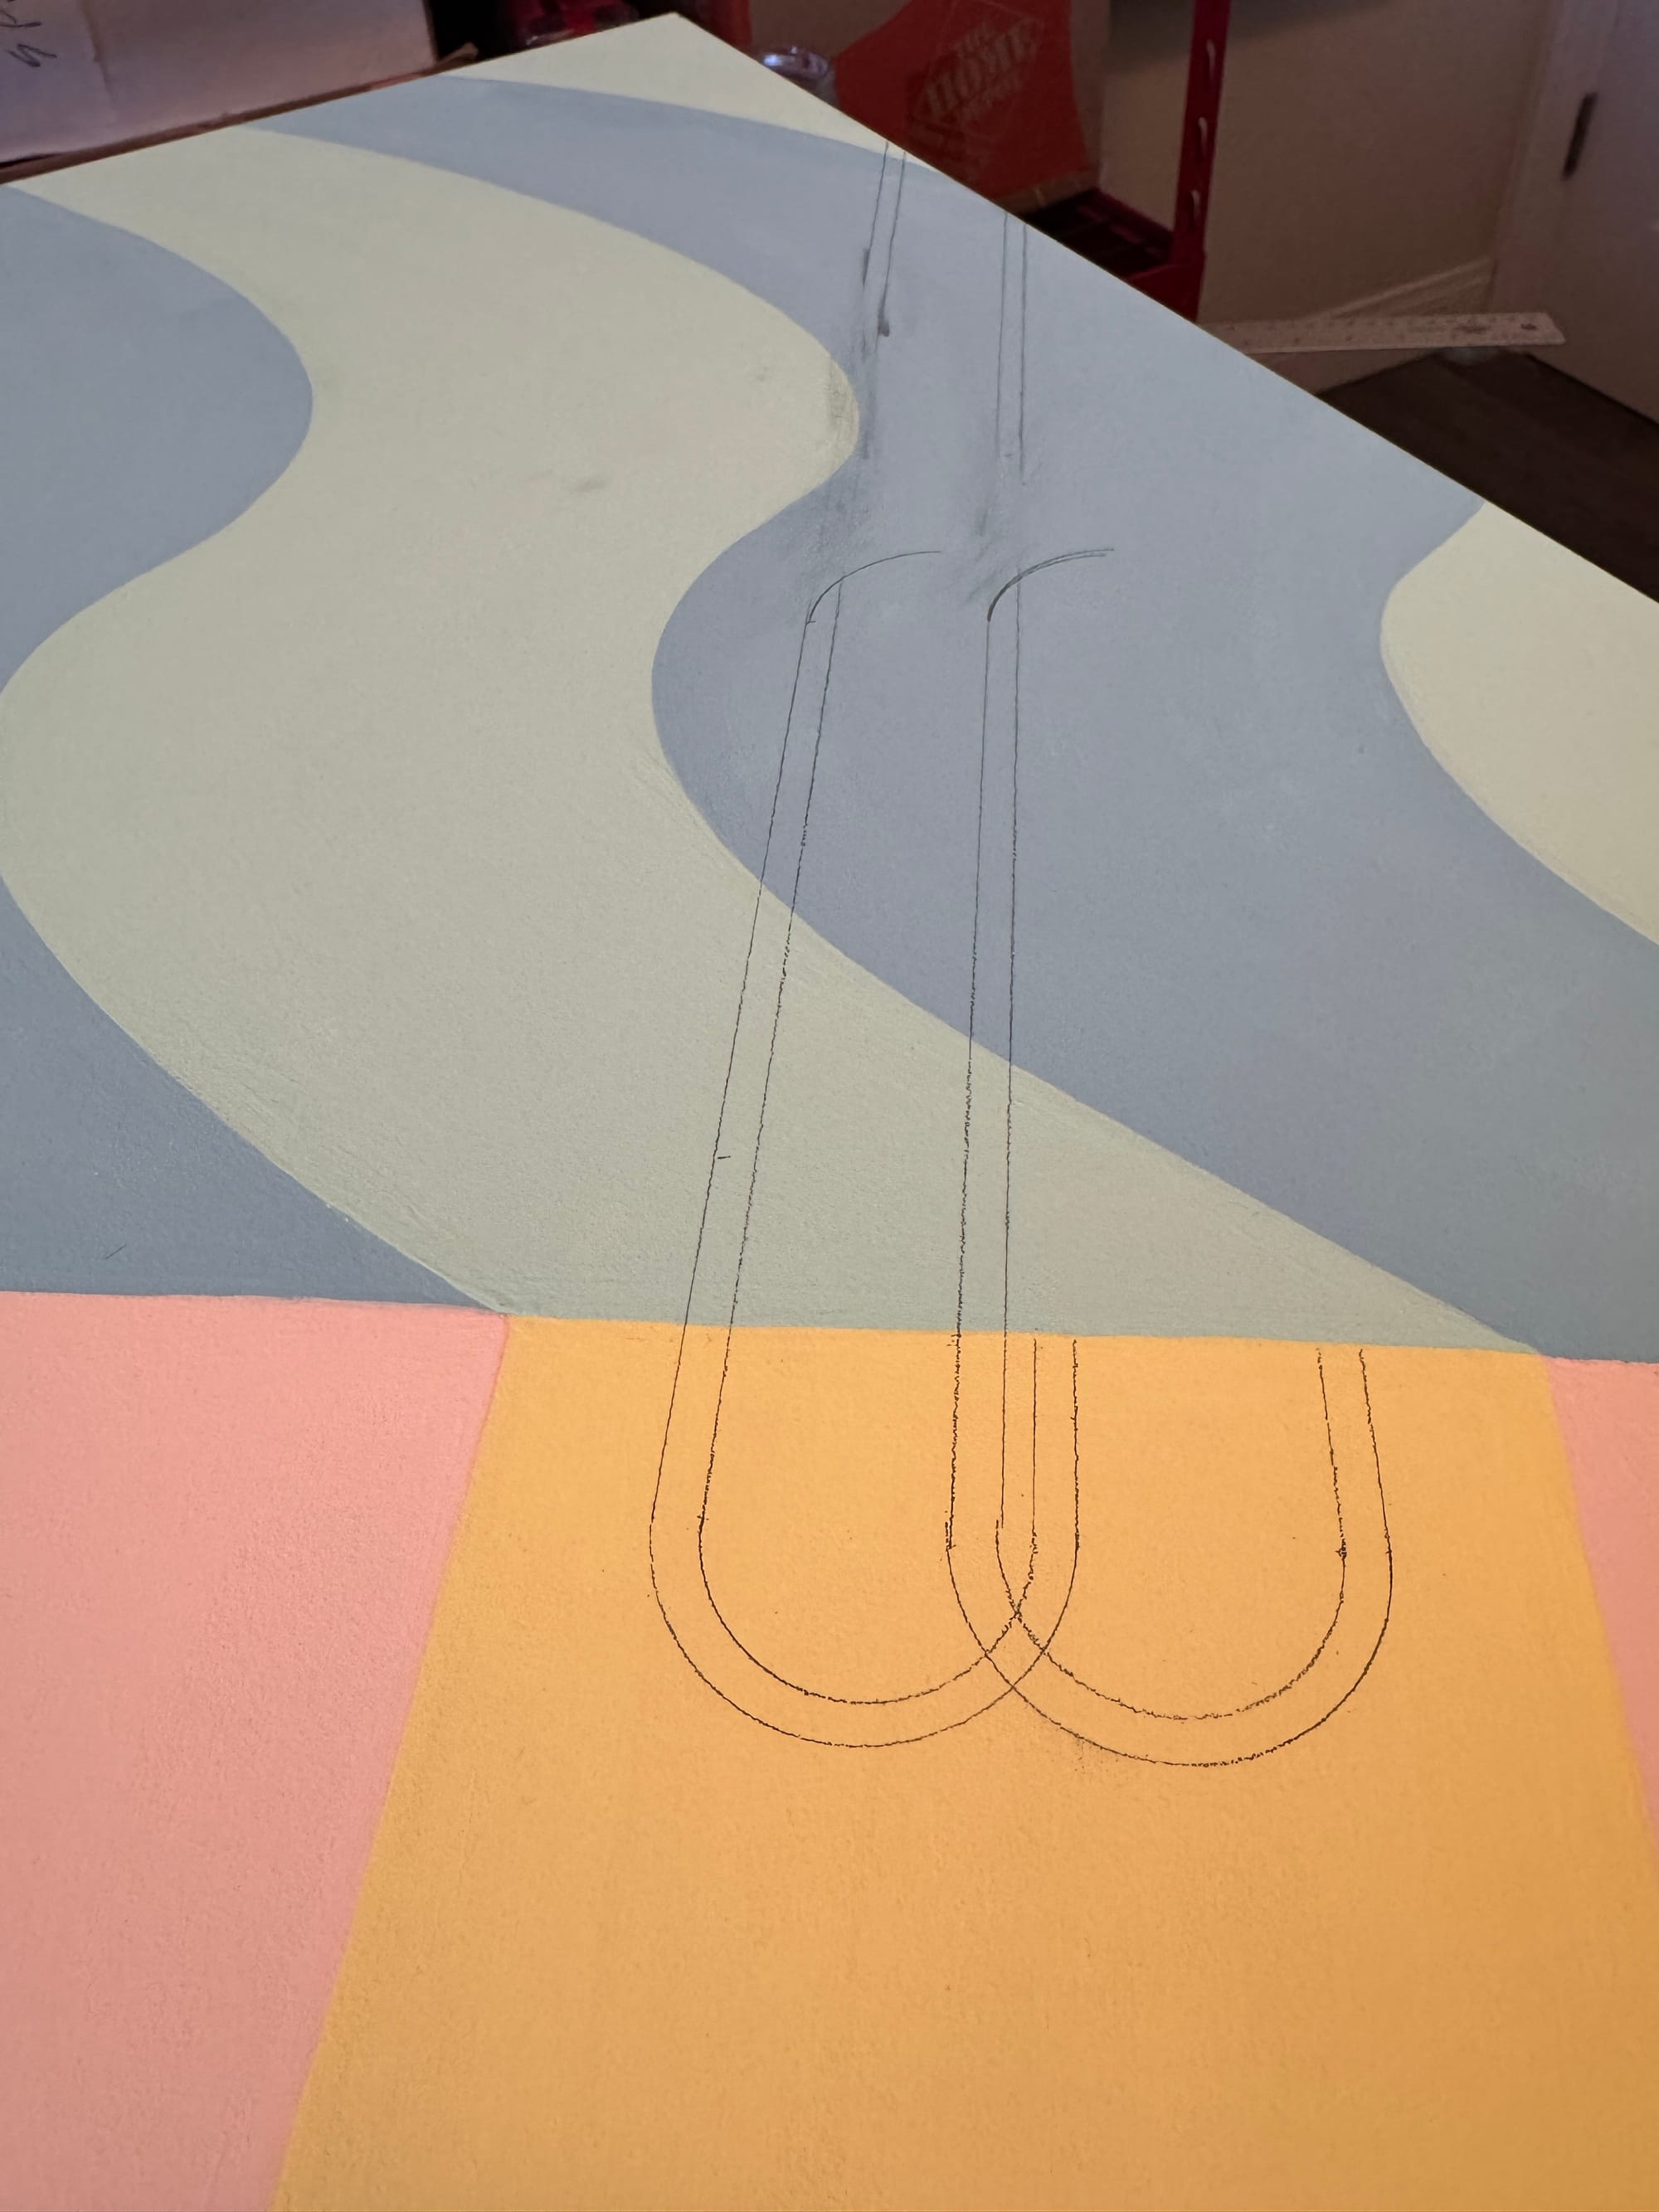
This is where I started to get a little nervous ... in my original design, I always pictured the "golden railing" (you know, that metal thing you climb on to get in / out of a pool) as extending all the way off the surface ... Why? Because I wanted to suggest that this budding romance was me "swimming into the deep end" (which I would say, was true …)
But alas, I pivoted; I took into account the relative size / weight of the other objects in the foreground (the martinis, the red glasses, etc) and I decided to give a more balanced weight to those pieces of the composition. So what did I do?
I did a complete about-face and decided to make the "golden railing" short ... and by that I mean, more like it is in a normal pool. As you can see, I made a mess of the pencil and really left some brutal skid marks ... I had to do some damage control and clean it all up ... 🫤
But all's well that end's well; I think I ultimately made the right call:
... but you might say "Micah, this looks cool — but doesn't it lose some of that resonance ... of swimming into the deep end?" On the contrary, I think the metaphor is actually stronger now ... Think about it like this: what's scarier — swimming into the deep end of a pool with a ladder that is massive, or swimming into the deep end of a pool with a smaller ladder to grab onto? 🧠
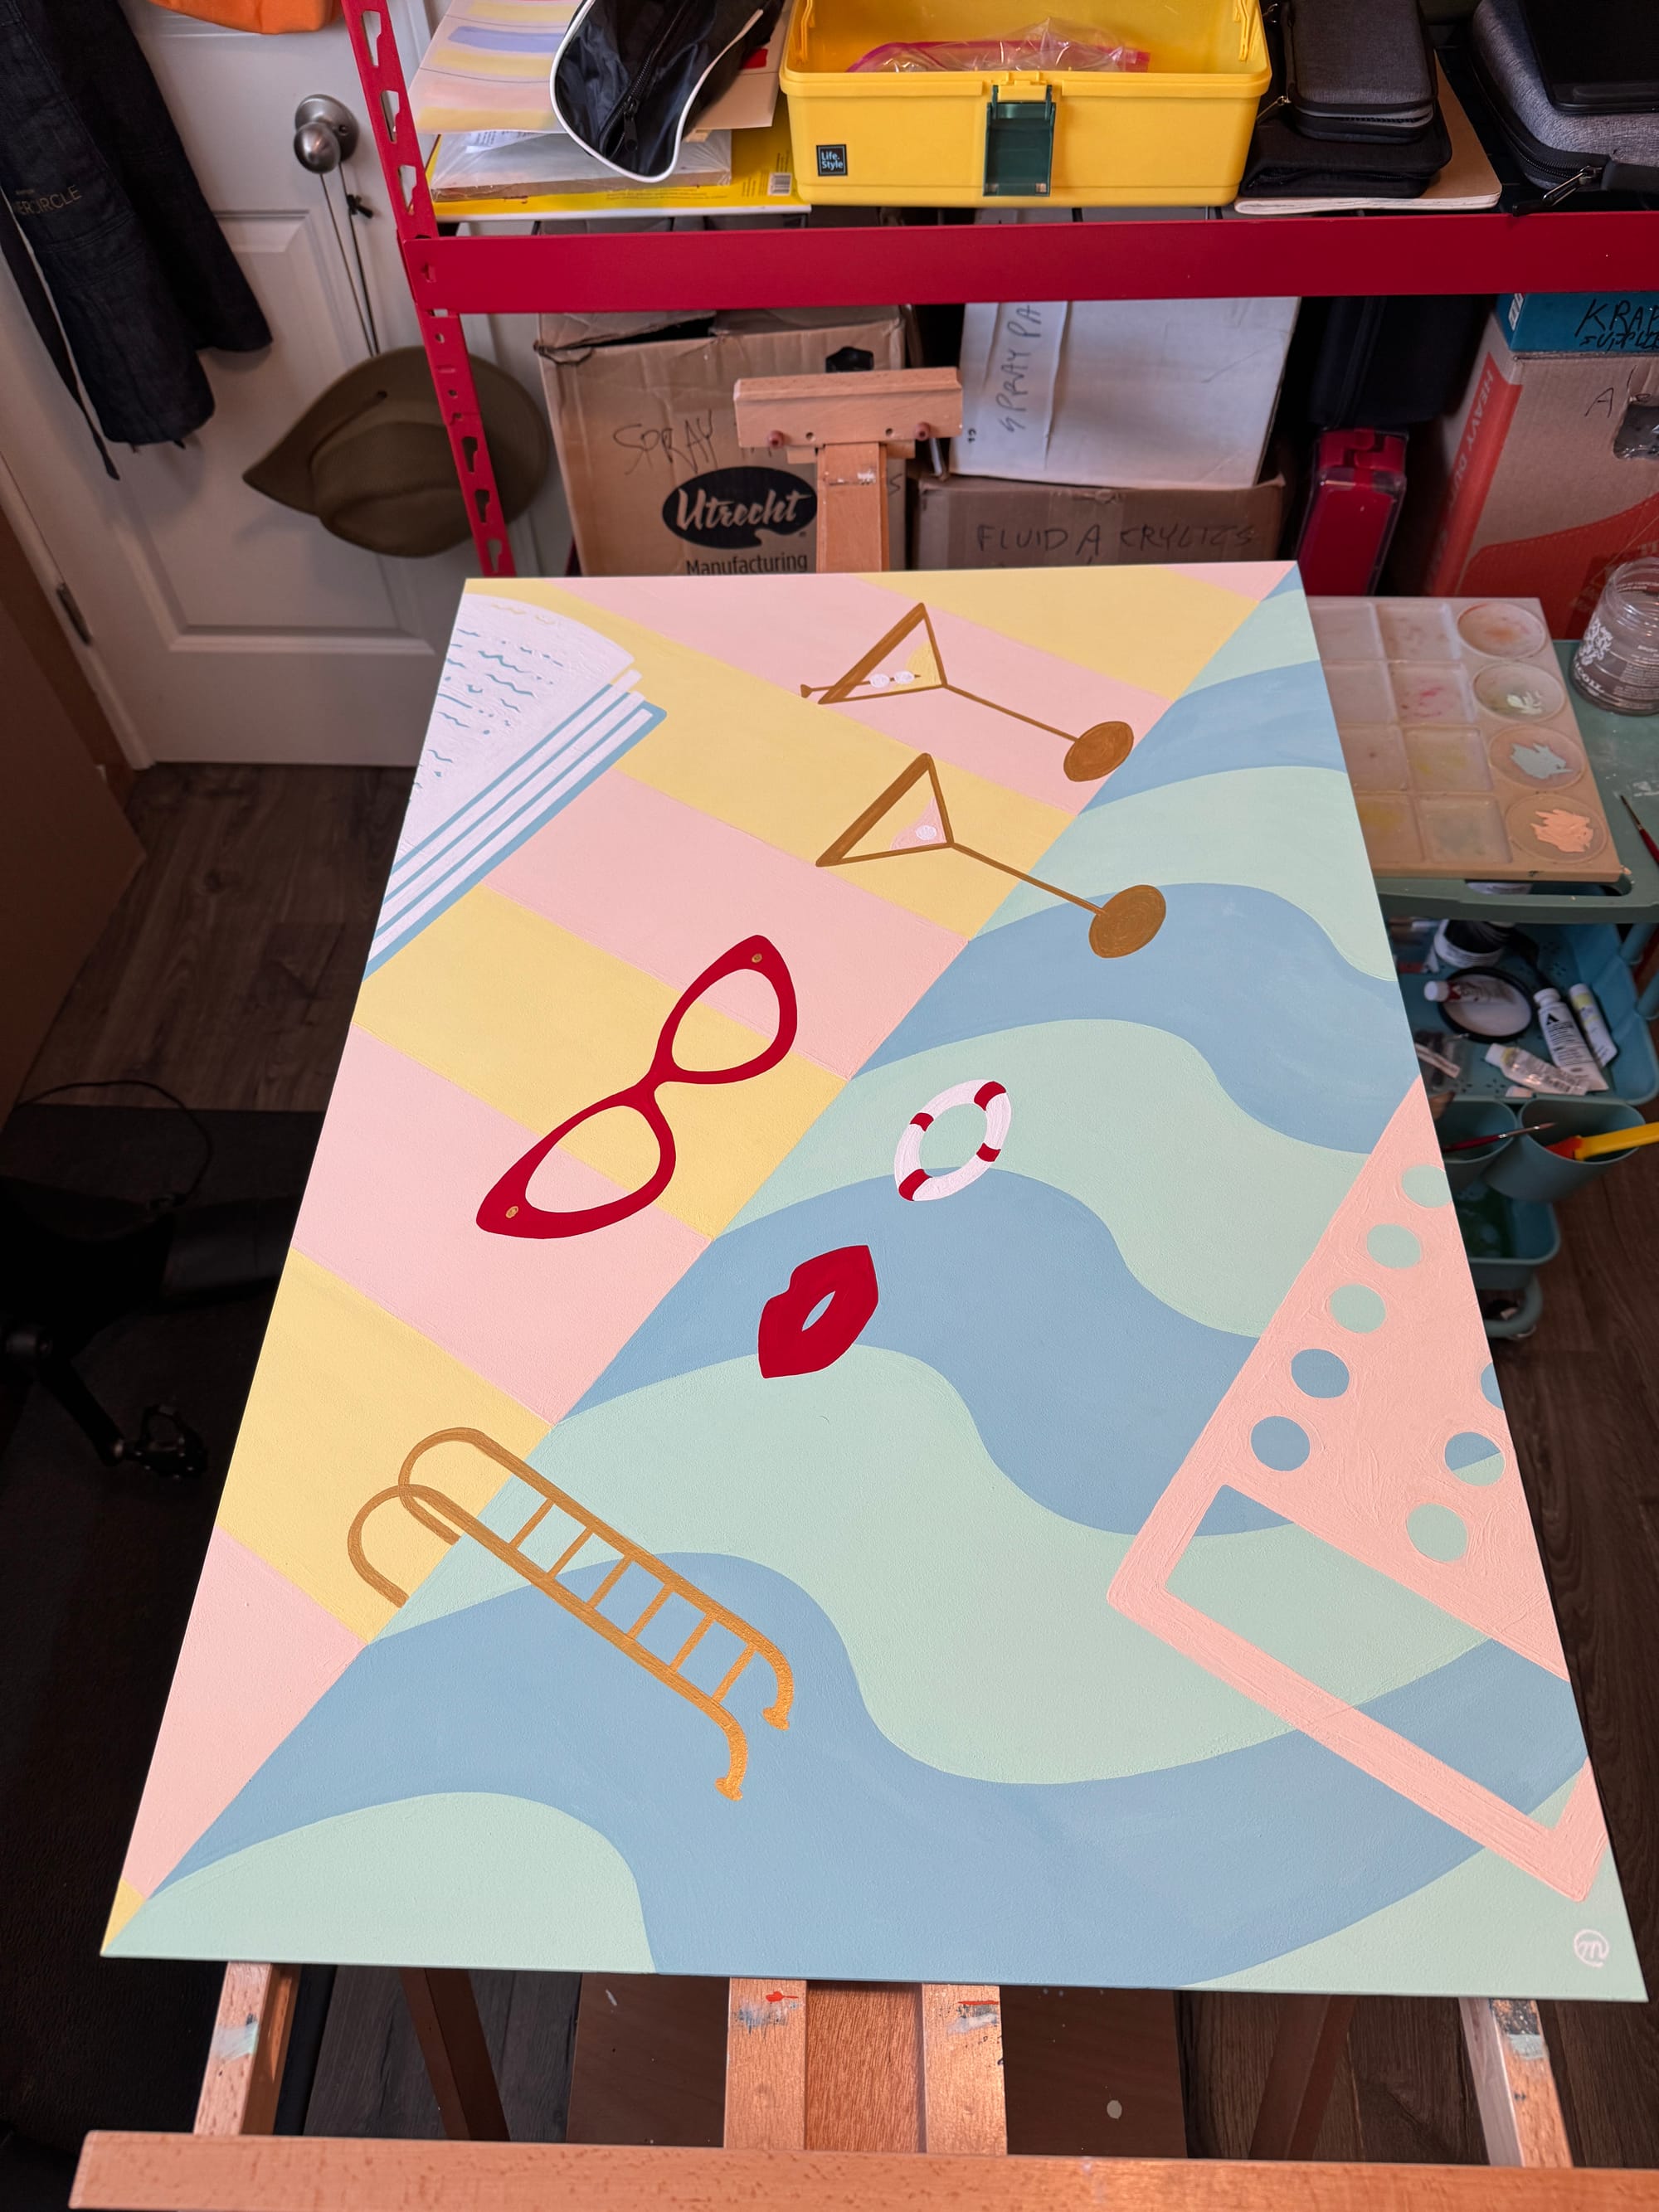
Also, with this now-truncated ladder, there is this lovely open space for larger items in the foreground: in the "pool" that would become an inflatable floating mattress, and up top, that would be a nice book (for some lazy poolside reading). I wanted those to be relatively similar to each other (in visual weight), and essentially be large asymmetrical counterparts to each other, balancing out the composition.
You'll see a major visual theme in this series is "negative space", and I really wanted to lean into that with this piece in particular. You'll notice that there are a lot of interior areas where I "could have" painted something, but I chose to leave blank ... You can see this in the partial opening of the "lips", you can see this in the little circles on the "inflatable floaty" (suggesting air pockets), etc. Notably, you'll also see this in the "text" of the book, and also the edges of the pages of the paper, etc ... I was very intentional with the negative space on the book; I could've easily scribbled out some text in gray or black paint, but I thought it would be more interesting to have the "text" be transparent (or an inverse), and instead leave the blue of the book-binding and the yellow of the towel shine through. I also chose to keep the triangle part of the martini see-through, as well as the lenses of the reading glasses ...
Why did you choose to paint "reading glasses" instead of "sunglasses"?
At one point I considered turning the "reading glasses" into "sunglasses" (with matte / flat black lenses) — which to be fair, would make perfect sense at a pool — but I decided against this for a few reasons:
- a) I wanted to use negative space to see the underlying yellow and pink of the towel "come through"
- b) I did a quick rough color test of the flat black, and I didn't like it; it was "too dark" for this composition, and really felt like it didn't "fit" in the palette
- c) A pair of "reading glasses" is the perfect element to connect to the "book", that will eventually lay on the towel in the upper left corner.
Initially I experimented with different colors of the martini cocktail liquid ... a soft peach / white, a greenish chartreuse ...
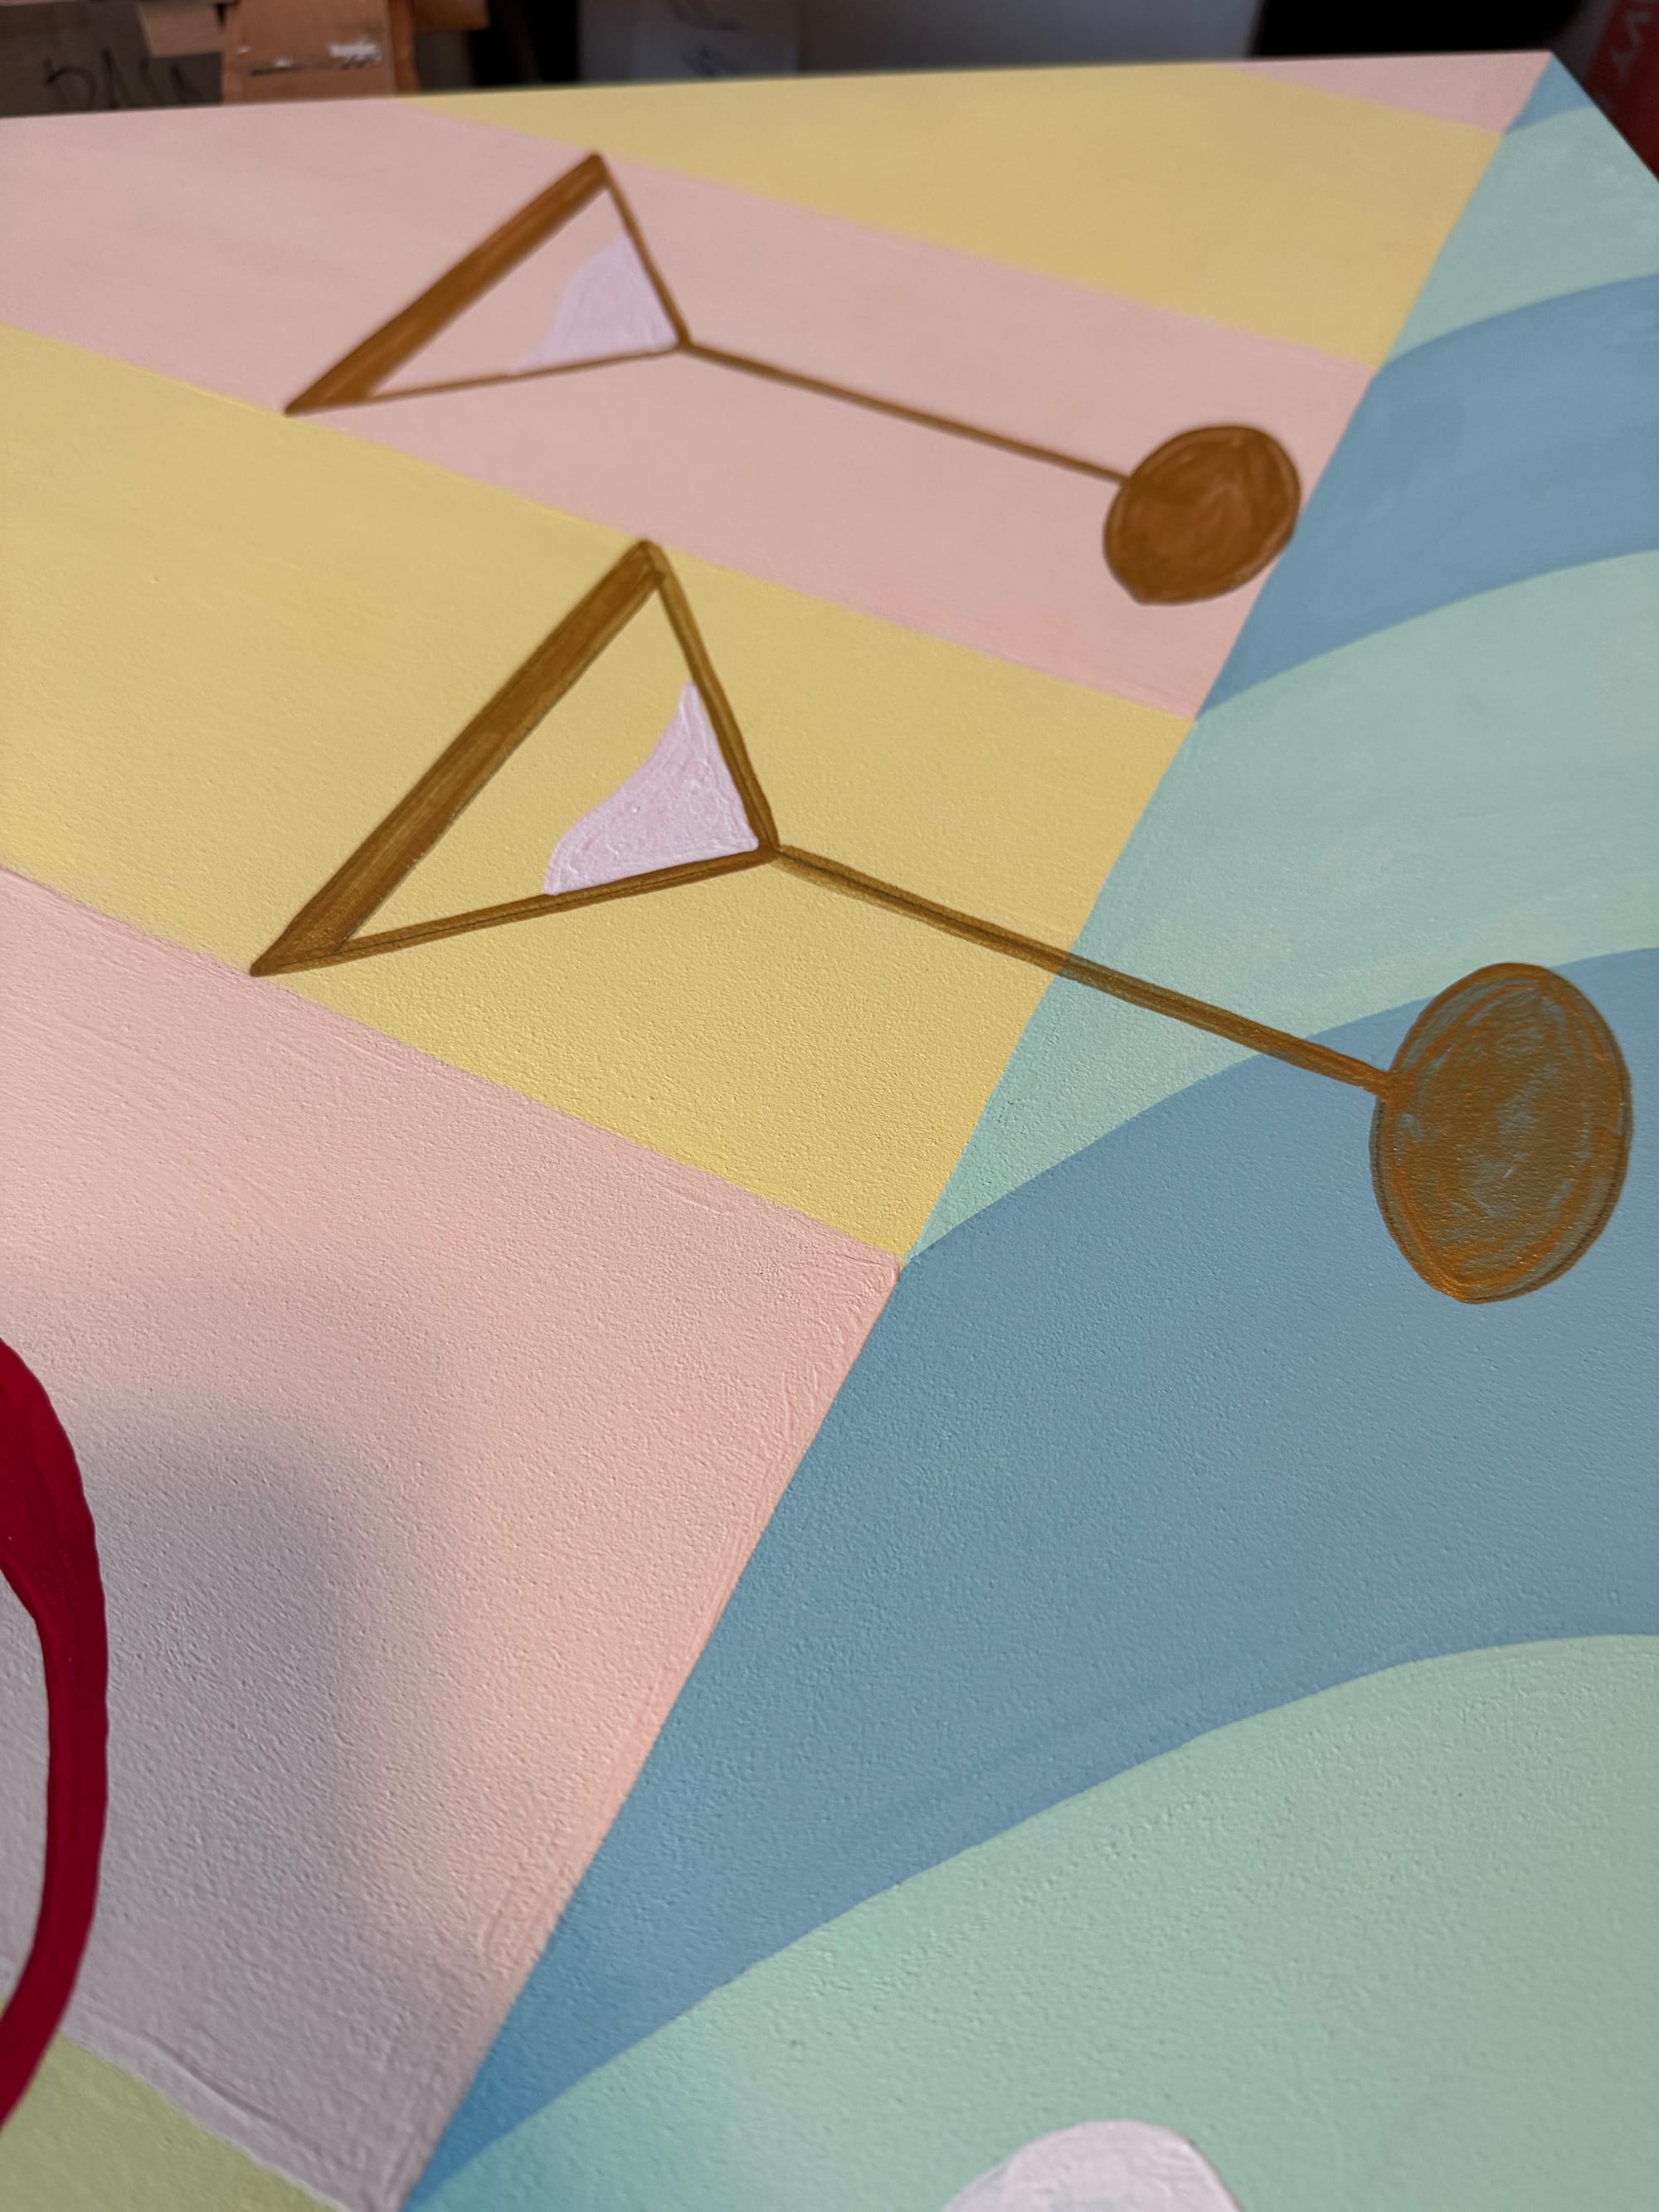
... but ultimately, again, I returned to simplicity … Why introduce a new color at all?
Why not streamline it and simply inverse the color of the stripe on the towel? (and then have the garnishes just be white on top, similar to the lychees we had on that fateful pool date?)
So that's what I did, and I think this approach is more economical and more playful from a composition / repetition perspective:
After putting the finishing touches on it & signing the piece — I took it over to the fine folks at POV.STUDIO to do a high-resolution scan of the final work.